Scenario: Your client wants to receive calls and text messages from customers in a specific or different number from their business number only during Mondays.
With smart routing, you may route calls directly depending on information that can be acquired about them, including if they are a repeat caller, their estimated location, their caller ID, the website they were using prior to calling, the current date and time, and more.
You may construct smart routers to perform complex routing depending on a particular caller information by using if/then conditions.
Calls can be routed to a smart router from a tracking number, a voice menu, or a call queue, and smart routers can be used to route calls to a voice menu, call queue, geo router, receiving number, or even another smart router in your account.
Table of Contents
Toggle1. Setting up the new Receiving Number.
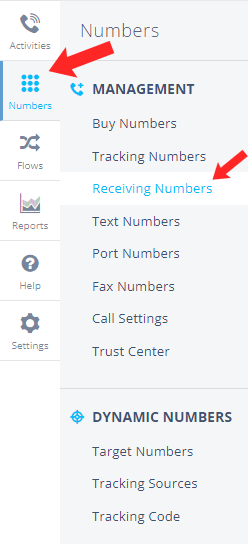
1a. On the Navigation Menu on the left, click Numbers and click Receiving Numbers under MANAGEMENT.
1b. On the upper right, click New Receiving Number.

1c. Type in the new Receiving Number. On the description box, type in ‘Monday Receiving Number’ or any description you would like. Then click Save Changes.
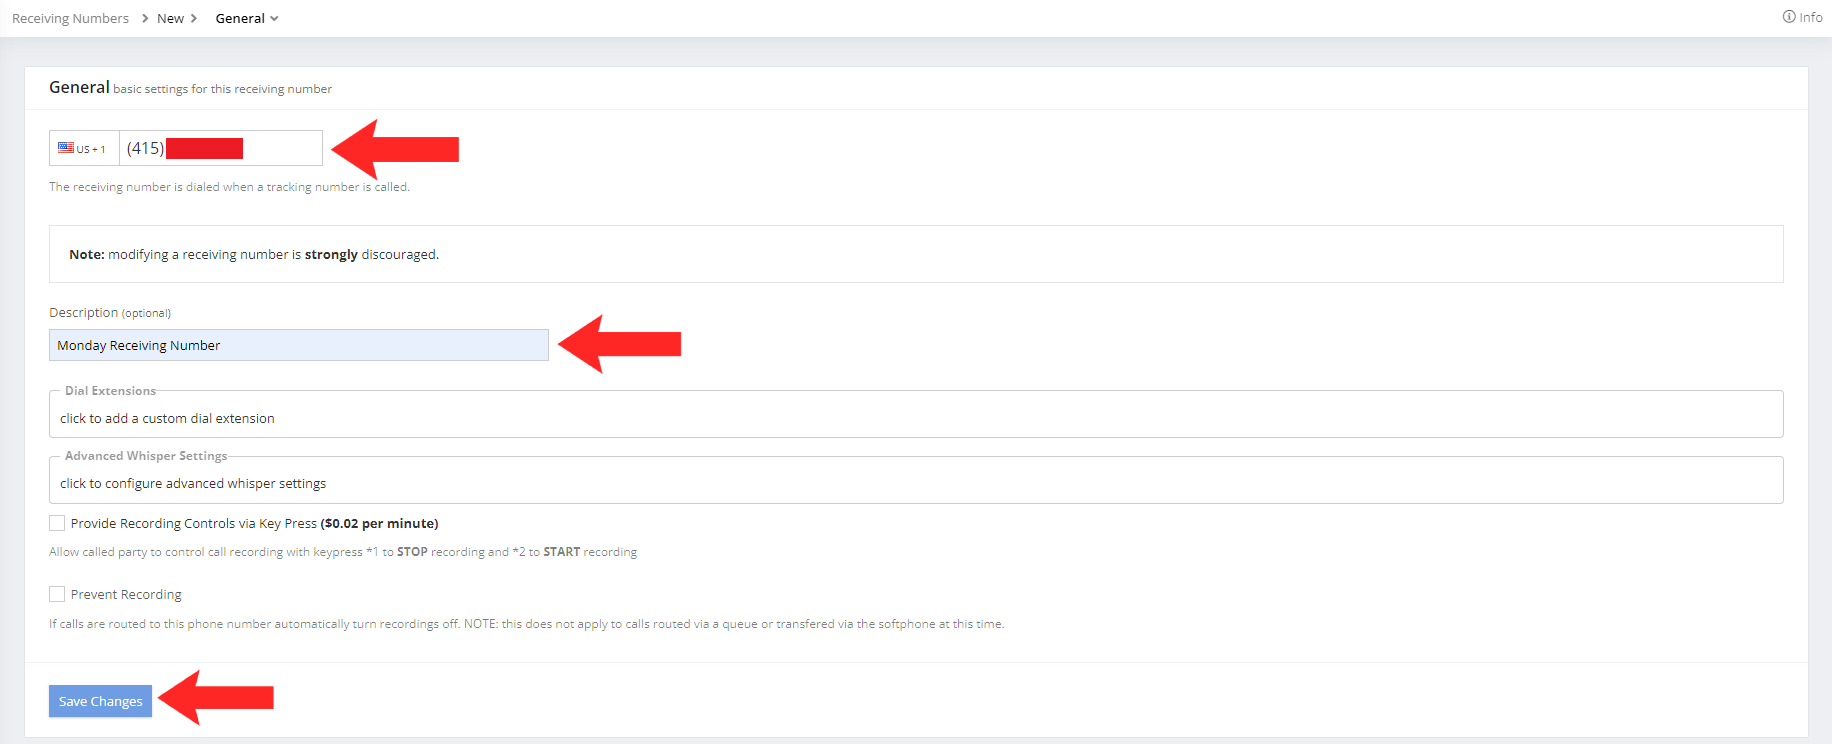
1d. This is how your Receiving Numbers should look like in the end.

Now that you’ve set up your new receiving number, it’s now time to set up your calls and texts smart routing.
Want to know where your most valuable leads come from?
2. Setting Up Your Calls Smart Router.
2a. On the Navigation Menu on the left, click Flows and click Smart Routers under ROUTING.

2b. On the upper right, click New Smart Router.

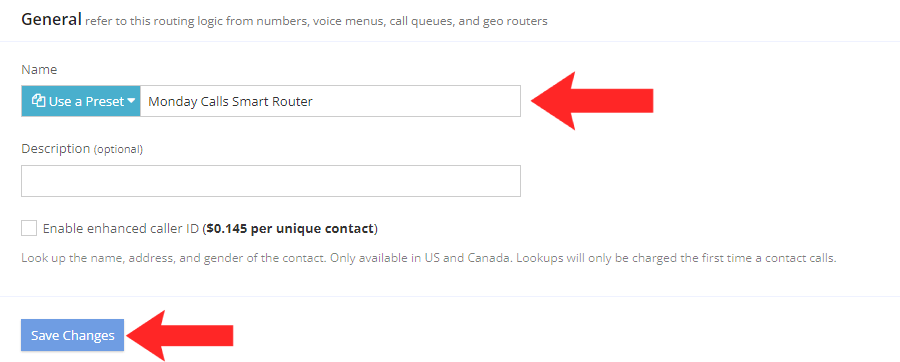
2c. Under General, type in the Name box ‘Monday Calls Smart Router’. You can add a description if you like. Then click Save Changes.
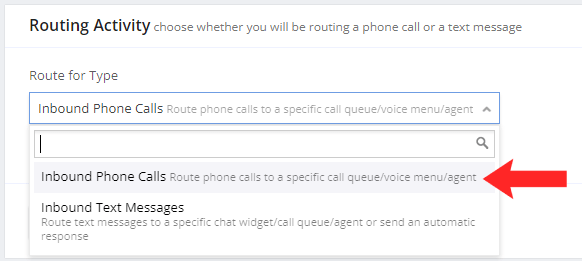
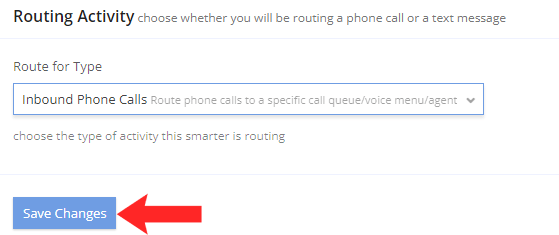
2d. Under Routing Activity for ‘Route for Type’, click the drop down box and select Inbound Phone Calls. Then click Save Changes.
2e. Under Routes, click Add Route.

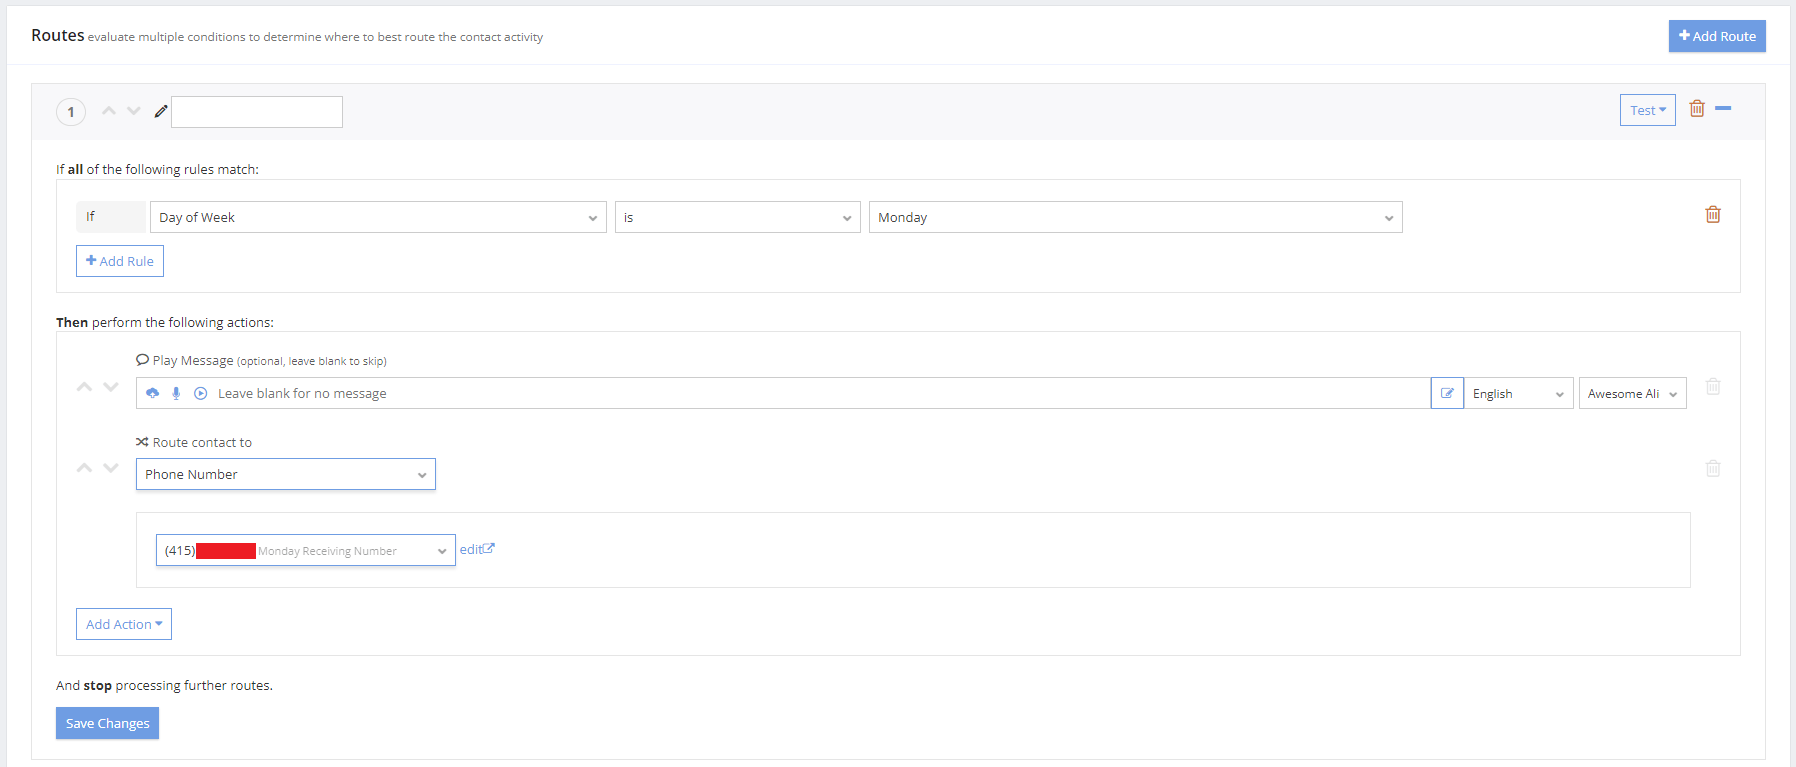
2f. Under ‘If all of the following rules match:’, click the drop down boxes and select ‘Day of Week’, ‘is’, and ‘Monday’.

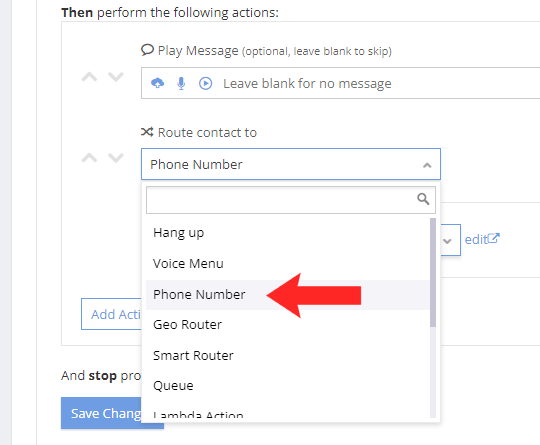
2g. Under ‘Then perform the following actions:’, click the drop down box for ‘Route contact to’ and select ‘Phone Number’.
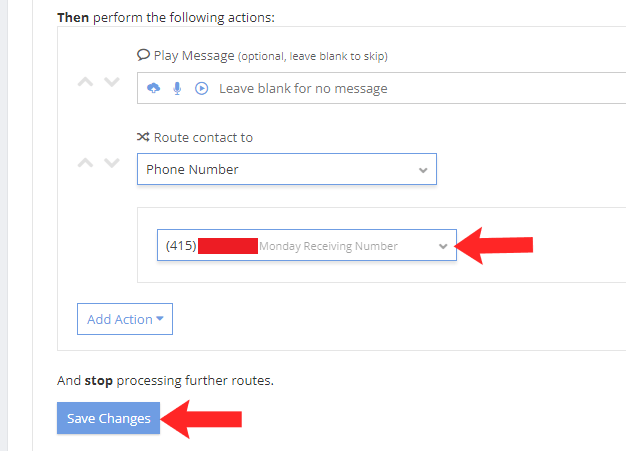
2h. Below that, click the drop down box to select your new receiving number you created ‘Monday Receiving Number’. Then click Save Changes.
2i. In the end, it should look like this:
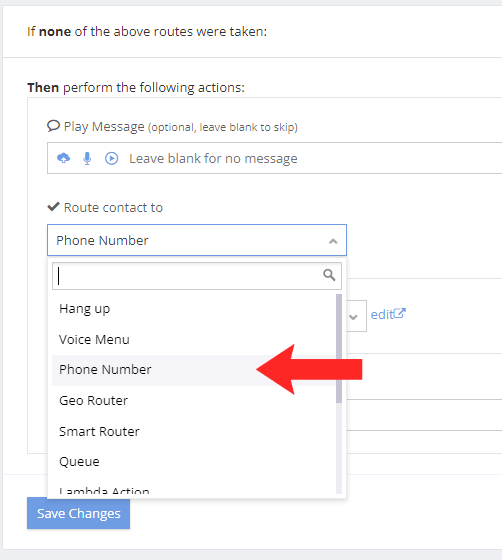
2j. Under ‘If none of the above routes were taken:’, click the drop down box and select ‘Phone Number’ for ‘Route contact to’.
2k. Below that, click the drop down box to select your Business number, then click Save Changes.

2l. Under Tracking Numbers, click on Edit Assigned Tracking Numbers.

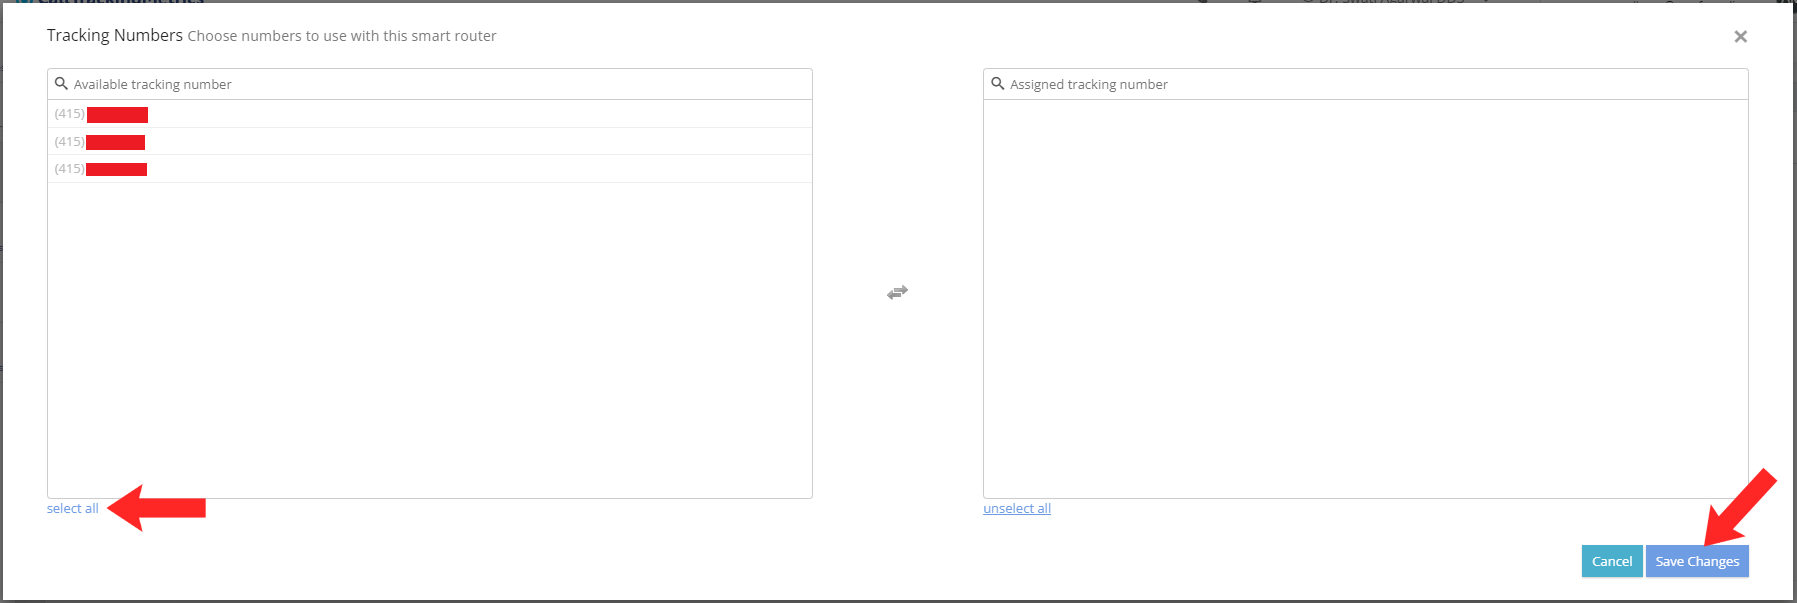
2m. A window will pop up. Click on select all to select the assigned tracking numbers. Then click Save Changes.
You’re now done setting up your smart router for calls!
Interested to know the best marketing strategy for your business?
3. Setting Up Your Text Messages Routing.
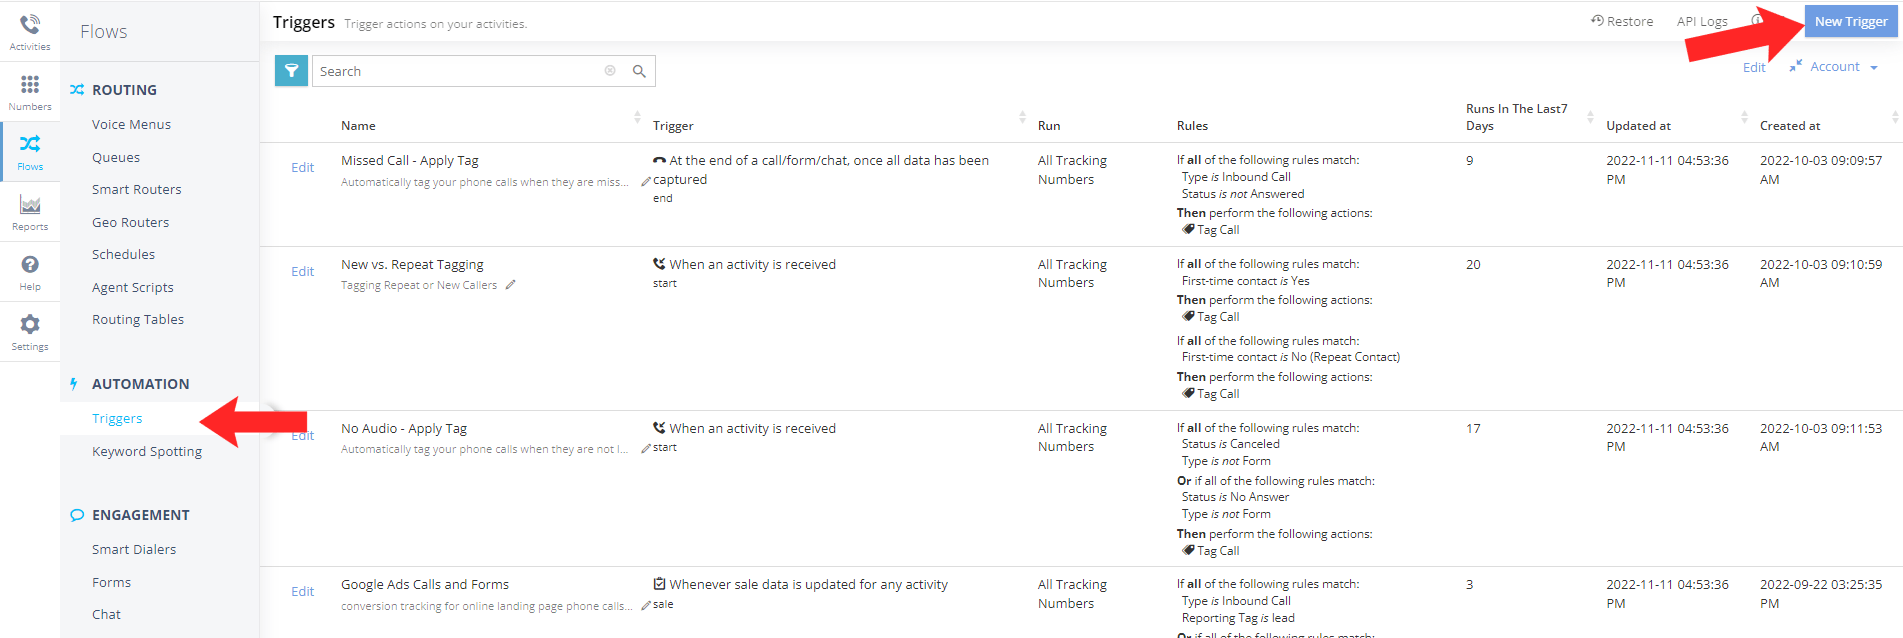
3a. Go on your Navigation Menu and click Flows then click Triggers. On the upper right, click New Trigger.
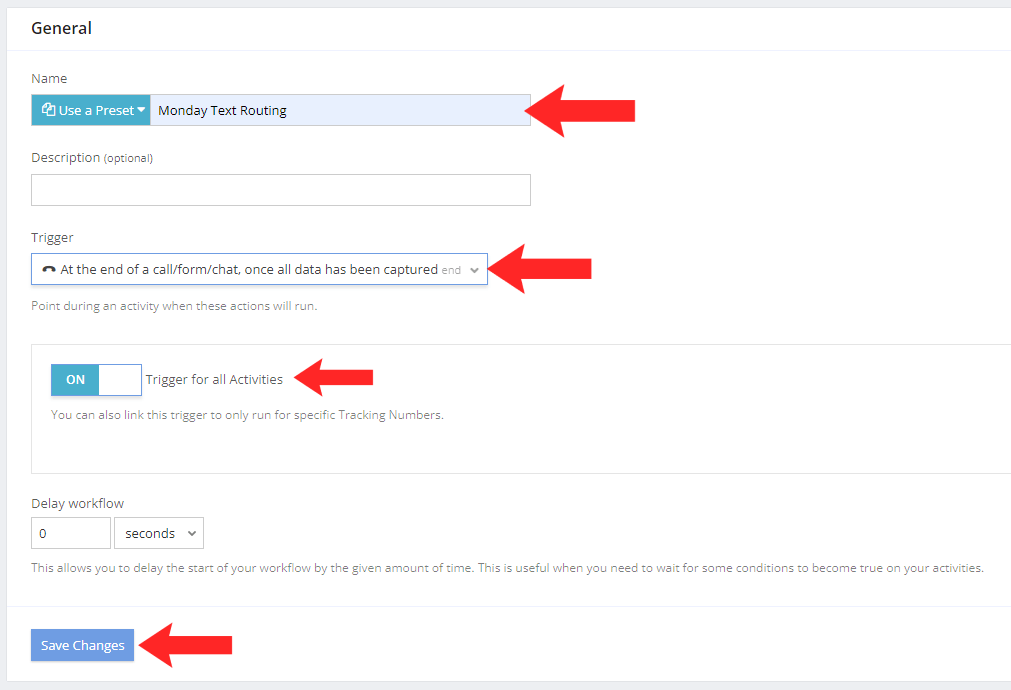
3b. Under General, type in the Name box ‘Monday Text Routing’. You can add a description if you like. Under trigger, open the drop down box and select “At the end of a call/form/chat, once all data has been captured”. Turn on Trigger for all Activities. Then click Save Changes.
3c. Under Workflows, click Add Workflow. Click Add Rule under ‘If all of the following rules match:’. And select these option in the drop down box: If ‘Type’ ‘is’ ‘Inbound Text’ ‘And’ ‘Day of the Week’ ‘is’ ‘Monday’

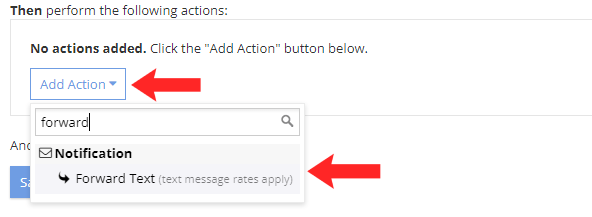
3d. Under ‘Then perform the following actions:’, click Add Action, and select Forward Text in the drop down box.
3e. Beside the ‘Called Number’ box, type in or select the Monday Receiving Number. Then click Save Changes.

You’re now done setting up both your calls smart router and trigger for text message routing. In the end, you should have set up a new smart router for calls, and a new trigger for text messages.
Do you need help in increasing your revenue?

