Sending personalized emails can be long and tedious, but there is a way to send multiple emails simply with Gmail and Google Sheets. Most importantly, you can do it for free.
Here are the steps to using Mail merge with Gmail and Google Sheets:
1. Copy this Google Sheet created by Google Developers
This sheet is will have the Mail Merge option next to the Help section.
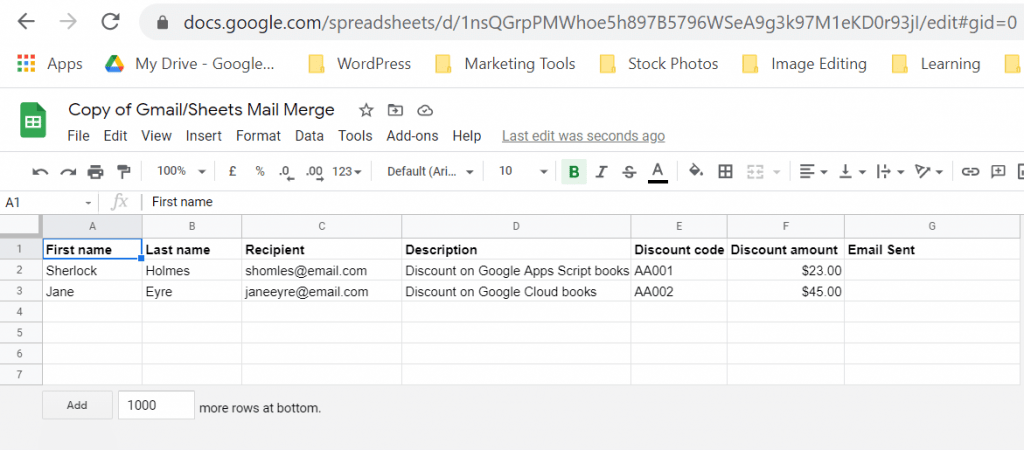
2. Fill out the rows with the information you want to send (you can change the variables)
These variables will be the ones that will be imputed in your emails
For this example, we use these variables:

3. Go to your Gmail and draft your email.
Include the variables that you want to include using this structure {{Variable}}.
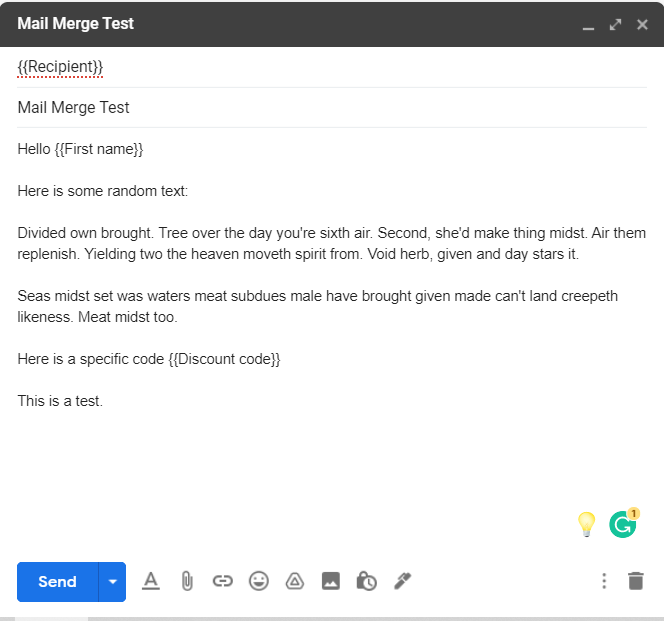
Tip: It’s important to correctly match your variable, or it will not work. So, it’s recommended to copy & paste from your sheet or vice versa when it comes to handling your variables.
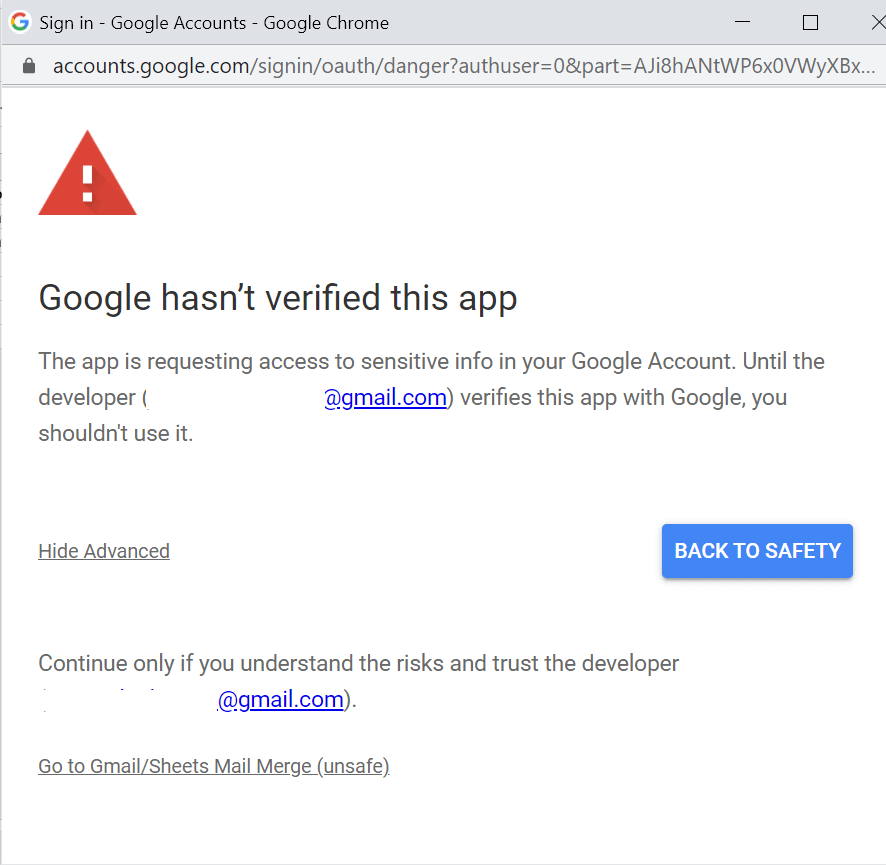
4. Click Mail Merge then it will ask for you to authorize your account.
When you first click on it, an error message will show. Don’t worry. This sheet is created by Google, so it’s safe to proceed.
5. Go then to Advance and allow it to connect with your Gmail account.
You’ll get a security email from Google in your mail.

6. After, go back to mail merge again and click Send Emails

7. You’ll be asked for a subject line. You will have to fill it out
To match the email you just drafted, put in the corresponding subject line in Google Sheets.

8. Once you type/paste the subject in, click Accept and the information in your sheet will be used in your emails.
If you didn’t have a time and date you want your email to be sent, it will be sent immediately.
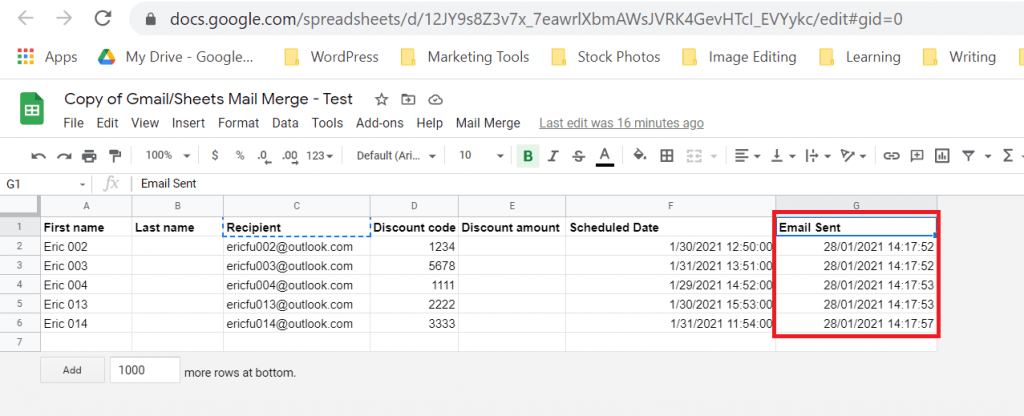
9. Go to your Gmail and go to “sent”
You will see all the emails you sent using Mail Merge.

Bonus: Scheduling your emails with Google Sheet’s Mail Merge option
In some cases, you want to schedule certain emails at a specific time to increase open rates.
To do this, you have two options:
Adding a Specific Code
This first option requires you to edit the script associated with the Mail Merge Sheet.
First, you have to go to Tools then go to Script editor.

Afterward, you copy this code from the section Scheduling/triggering bulk emails and paste it into your Sheets code.
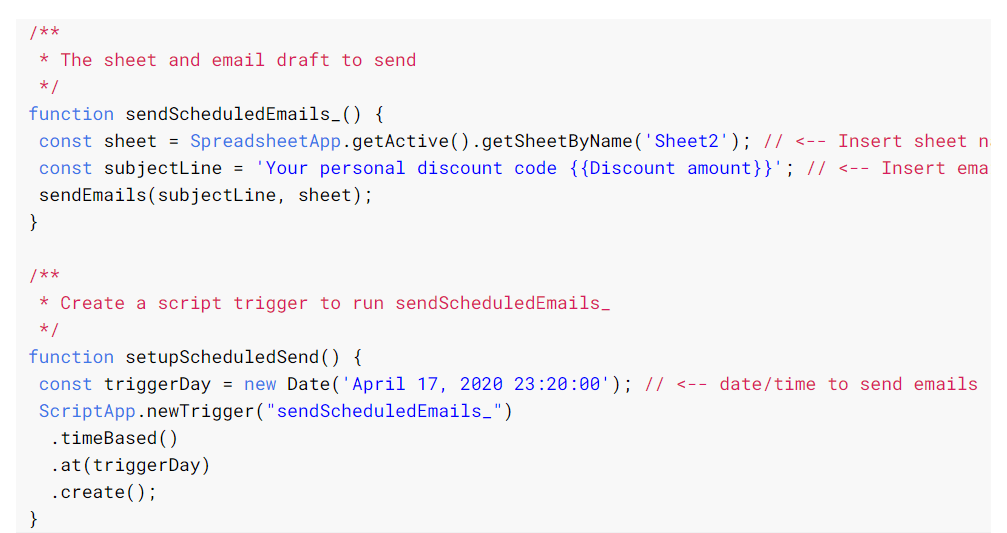
This will allow you to schedule your emails once you add the code.
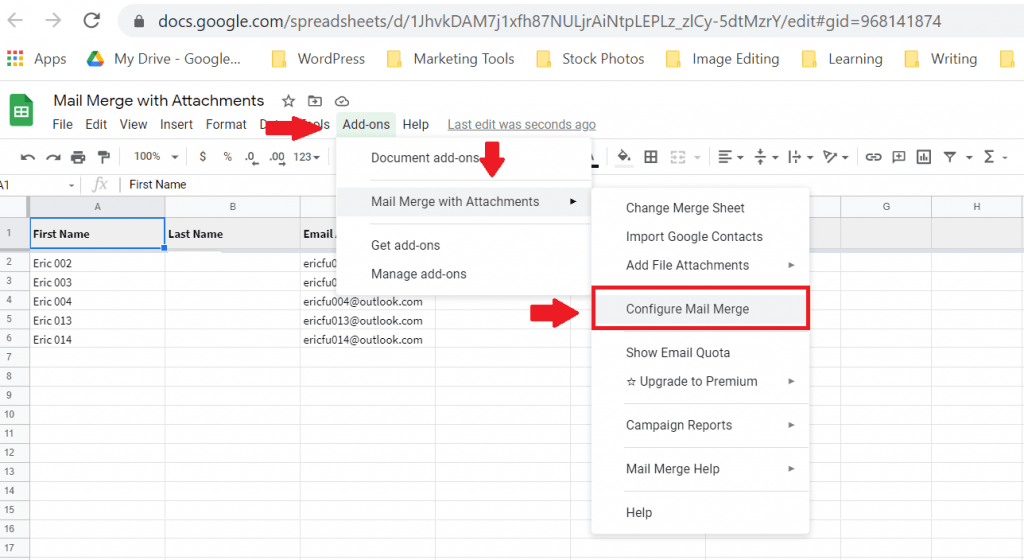
Download a Mail Merge Add On
The second option is easier especially if you are unfamiliar with coding. Add-ons make things simpler.
There are many options to choose from and Mail Merge add-ons have small differences, but they should have similar functions. In our case, we used an add-on call Mail Merge with Attachment.
Note: Unlike the first option, using this add-on has a quota of 25 emails sent per account. You can send 400 emails per day if you buy the premium version.
Once you download this onto your sheet, you’ll have to activate it by allowing it to edit your sheet.
Then you will click on it again and click on Create Sheets. This will create columns similar to the mail merge sheet that Google created but with a Schedule column.

You can create or remove columns depending on the variables you want to include in your emails.
After you do that, you’ll click on the add-on again then go to Configure Mail Merge.
There you’ll have options to add a Sender’s Name and even track it with Google Analytics.
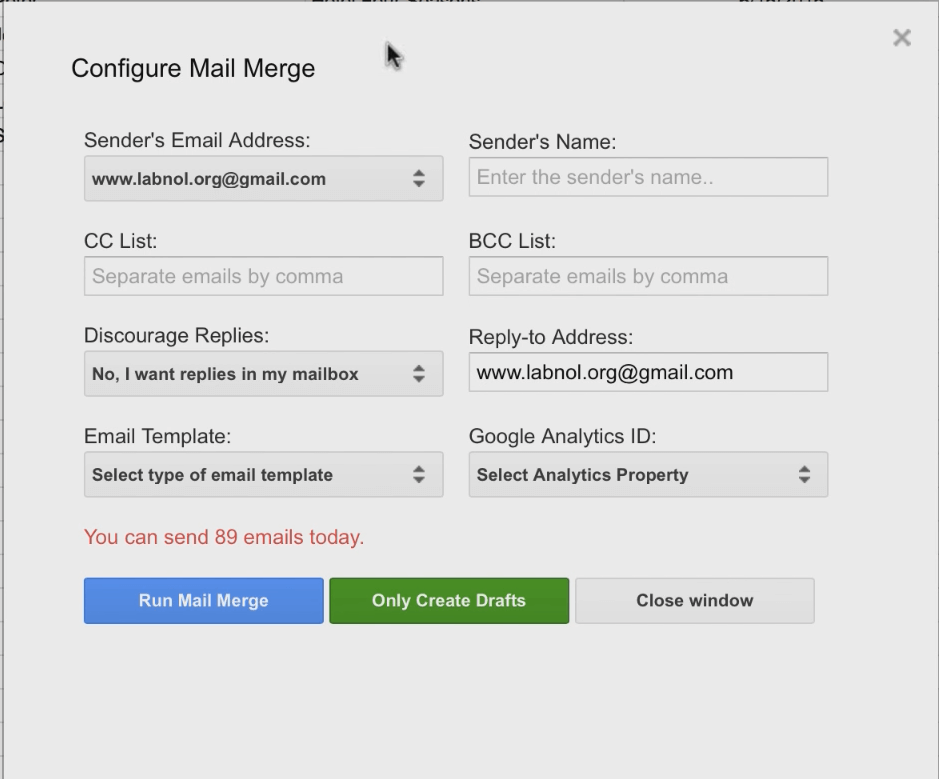
Next, you have an option to choose using a Gmail template you created as long as you choose the correct subject line.

The other option is to write a template in HTML.
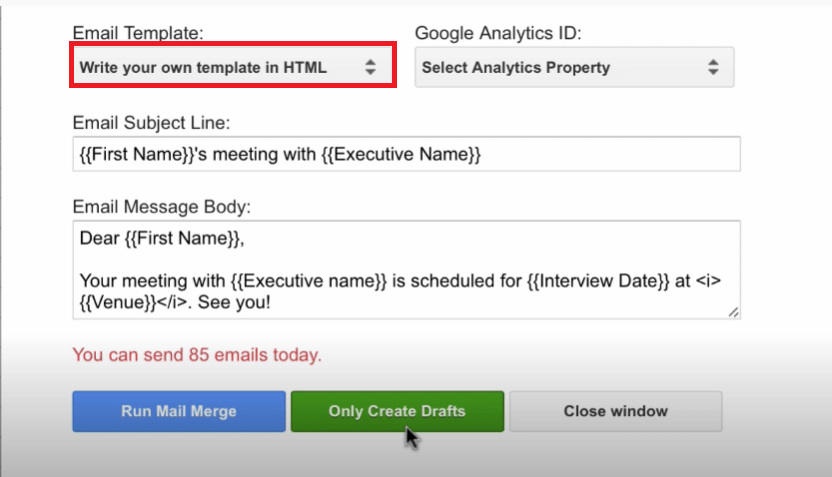
Both options work as long as the corresponding variables match the columns in your sheet.
Note: With scheduling, you need to make sure your Google Sheets is calibrated with your time zone. You can do this by going to File => Spreadsheet Settings => set it to your corresponding time zone.
Conclusion
With these steps, you’ll be able to use Mail merge with your Gmail and send multiple personalized emails. I hope these steps will help you start your email campaign or improve your current email campaigns.
If you want to know other email strategies, here are two articles to read:
How To Read Your Emails In One Folder – Setting 1 Unified Inbox

