Want to start digital marketing for your E-commerce business but don’t know where to start? Then this guide will help you how to set up Google Merchant Center quickly.
E-commerce offers lots of opportunities for entrepreneurs and established businesses. However, success in online stores not only relies on the quality of products but also marketing strategies. Google Merchant Center is a platform that enables businesses to showcase their products directly in Google’s search results, making them more visible to potential customers.
With the digital marketplace evolving fast, understanding how to set up and optimize your Merchant Center account is essential for maximizing your online visibility and driving sales. This guide will help you set up your Google Merchant Center account so you can grow your e-commerce business and improve your digital presence.
Want to increase your revenue through Google Ads Shopping?
Table of Contents
ToggleWhat Is Google Merchant Center?
Google Merchant Center is a Google product that allows business to show their products directly on Google’s various platforms for free. Here are some of their main features:
- Add products to Google Shopping Listings
- Advertise products through Google Ads integration
- Get product performance insights through Google Analytics integration
- Get online product reviews from customers
- Redirect customers to a website product page
Google Merchant Center improves the visibility of products in Google search results and other platforms. It offers various tools and features to help businesses optimize their product listings and monitor their performance. It is a great platform for businesses looking to expand their online presence and drive sales through Google’s vast ecosystem.
Step 1: Sign Up For Google Merchant Center
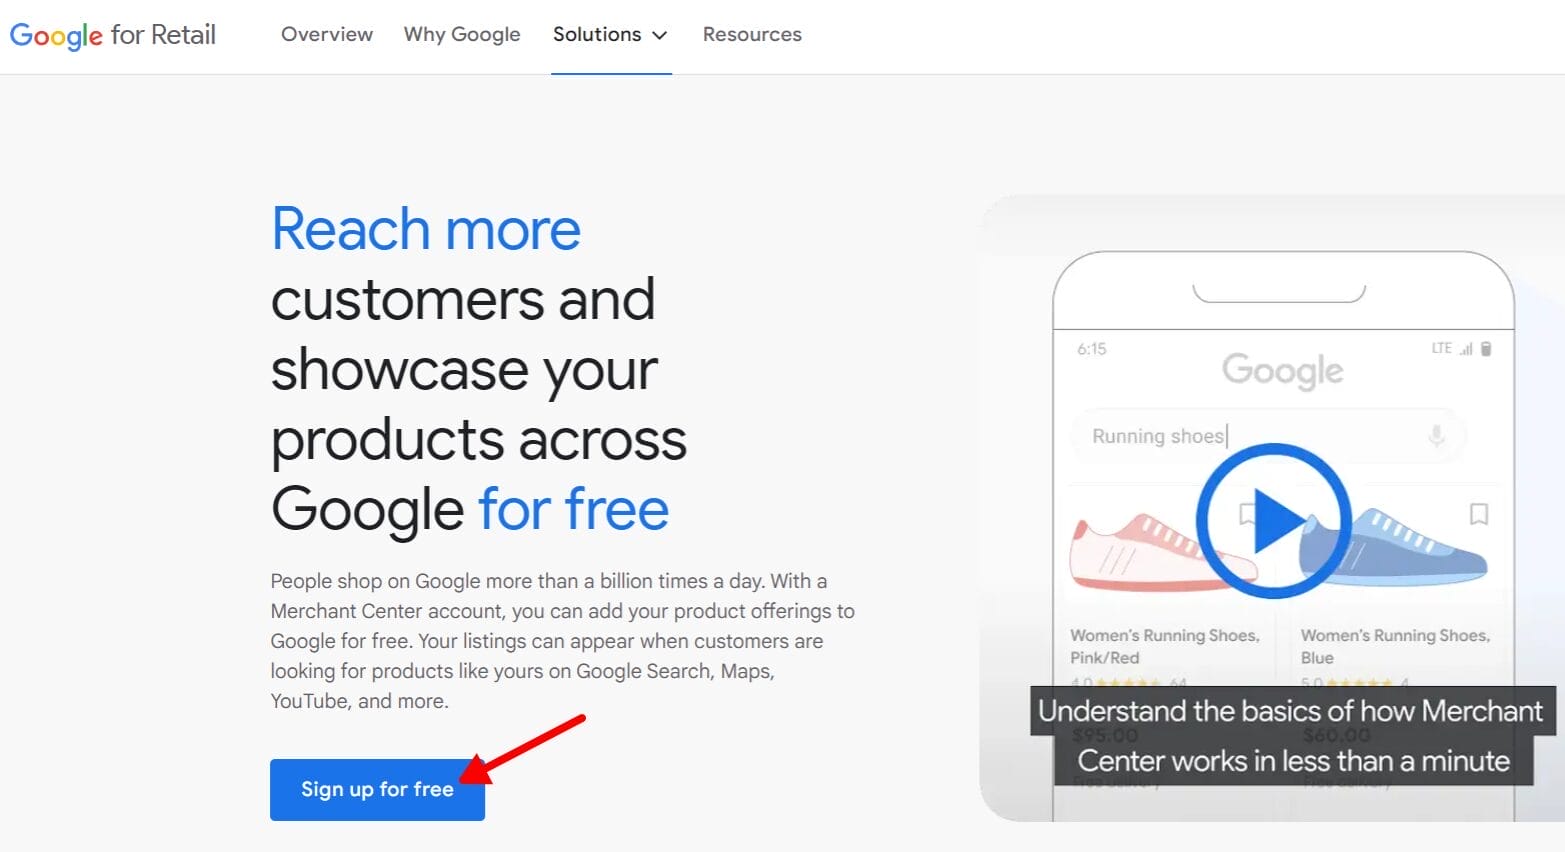
Go to Google Merchant Center website and click “Sign up for free”. You need to have an existing Google account and make sure that you are also logged in before you get started. If you have multiple Google accounts logged in, you will need to choose which account you’ll use for Google Merchant Center.

Then, you should be redirected to this page. Click “Yes” for the first question and enter the URL of your online store or website URL. Then, select the option if you have a physical store or not. Click “Continue”.

You should be redirected to this Google Merchant Center page where you can read everything you need to know about the platform.

Scroll down to the bottom and click “Continue to Merchant Center”.

Now you need to enter your business name. Read this quick guideline on how to input your business name correctly. Then, select the country where your business is registered, then click “Continue to Merchant Center” again.

Step 2: Set Up Business Address, Phone Number, And Verify Your Website.
This pop-up will show up and just click “Get started”.

You should now see your Google Merchant Center dashboard. You’ll also see here what you need to accomplish to fully complete your Google Merchant Center setup. Let’s set up your business address first.

Input your business address here. We recommend using the address posted on your website. Once done, click “Continue”.

You’ll notice that your online store will be automatically confirmed here after working on some details of your business. Now you need to verify your phone number. Click “Verify”.

Input your phone number here, make sure that you use the phone number that is also posted on your website for an easier verification process on Google Merchant.

Select how you would want to receive your verification code.

Then, enter the verification code here. Click “Finish”.

Google Merchant Center too complicated?
Set Up A Consultation With Our Expert!
Step 3: Set Up Tax And Shipping Options
After setting up your business details, you can now add details to show how you’ll ship your products.

Add the countries that your business is serving. Once done, click “Continue”.

If you select multiple countries earlier, you’ll have an option to add shipping information for each country. Select the country and click “Continue”.

Now you need to select if you’ll have the same shipping cost for all of your products or if you have specific costs for specific products. Select “All Products” now and you can change it later. Then click “Continue”.

Now you need to give information about how you’ll determine your delivery times and order cut off, you can also change this later.

Next, input how many days you’ll need before shipping your product. This is important so your customer will have an idea of how long it will take for them to receive their packages. Then click “Continue”.

Select your currency and choose your shipping cost options.

If you selected “Paid Shipping” or customers pay for shipping, you need to set your shipping cost type, either you set a flat rate, or it depends on product price, carrier, weight, and others. After selecting, click “Save”.

You should see the summary of your shipping information that has been added to Google Merchant Center. Review it and check if everything is correct. Then, click “Done”.

Now you need to set up your sales tax to show the total product price.

You can manually set up your sales tax, but to make it easier, you can just select “Automatic based on customer location”. Then click “Save”.

You can check the full shipping settings information here.
Step 4: Add Your Products
Now you can finally add your products.

There are different ways to add a product in Google Merchant Center, you can add using a Google Sheets template, one by one, and using API. Select “Add products one by one” just to get started.

Now you’ll need to input all your product details, images, price, product condition, availability, labels, shipping weight, and size.

Once you’re done, click “Save”.

Once done, you should see that all the steps here are already checked, all you need to do is wait for Google Merchant Center to review your products. It may take 7 business days for Google Merchant Center to review your products.

Don’t know where to start on Google Merchant Center?
Conclusion: Setting Up Your Google Merchant Is Easy
Setting up Google Merchant Center is an easy e-commerce strategy that can increase the visibility and performance of your online products. By following the step-by-step guide outlined in this article, you can now start showing your products on Google for free! With Google Merchant Center, you can easily connect with potential customers, driving sales and maximizing your online presence in today’s competitive digital landscape.
If you want to maximize your Google Merchant Center account, you can set up a free consultation with our experts! We can help you increase your sales and grow your business, so you can keep up with your competitors.


