There are multiple different types of reCaptcha. We’ll go over which version you should choose, how to add it in correctly, and then how to hide reCaptcha badge.
reCaptcha use case, when to use it and when to not: sometimes your site will get spammed with bots who submit your forms with spam. It’s super annoying. If it’s just one or two spam submissions, we recommend ignoring it because adding captcha will slow down your site even though it’s just a few milliseconds. But sometimes the spam is too much and you will have to add it reCaptcha.
Table of Contents
ToggleDifferent versions of captchas have different levels of security.
There are a total of four types of reCaptcha.
- reCaptcha v3,
- reCaptcha v2 “I’m not a robot” Checkbox
- Invisible reCaptcha v2
- reCaptcha Android.
As shown below:

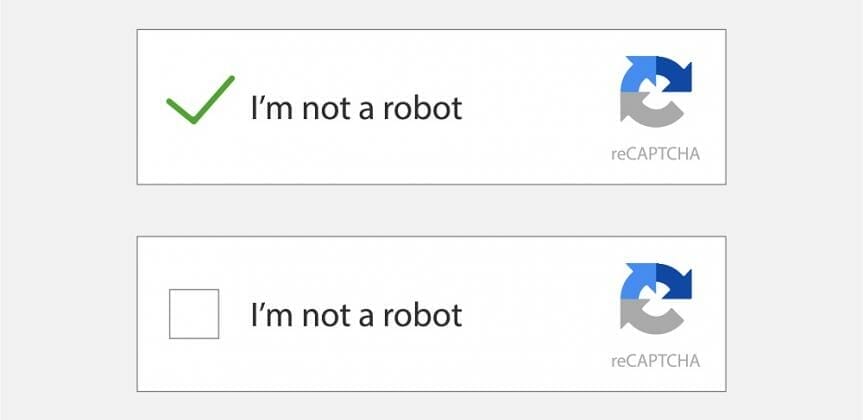
reCaptcha v2 (“I’m not a robot” checkbox)

This is what you typically see and know it as. It’s the box that requires you to click on it and asks you to click on images to see if you are a bot.
reCaptcha v2 (Invisible reCaptcha)

This is what’s known as the invisible reCaptcha. All you see is a badge, and it doesn’t require the user to click on a checkbox. It tracks the mouse movements to see if it’s a bot or a human. In terms of user experience, this version is much better than reCaptcha v2 (“I’m not a robot” checkbox) which can deter users from submitting a form and lowers conversion rate. However, this one is less strict than the “I’m not a robot” version and will let some spam slip by.
Only if it detects that a user is a bot, then checkbox test will pop up asking it to fill it in.
reCaptcha v2 Android
This is an API Library for adding reCaptcha to an android app. You can safely ignore this one as a web developer.
reCaptcha V3
This one is also invisible and just gives you a score on how likely the website viewer is a bot or not. You have to choose what to do with that score, whether to block or allow at a higher or lower score. That is up to you.
Otherwise, it’ll just tell a real user who it thinks it’s a bot that your “form is not working properly” and won’t even give it a chance to check a checkbox to prove itself. This is horrible user experience wise because if it thinks the user is a bot when in fact the user isn’t, the user will not be able to submit the form.
And the problem with reCaptcha v3 is, it tracks all the mouse movements on every page, not just on the page you have the form on like reCaptcha v2. With reCaptcha v3, because it tracks every page, it will affect your entire site’s speed.
- If you do end up using use reCaptcha v3 though: you should, use Aysnc Javascript plugin:
-
- what does the plugin do?
- “Async JavaScript gives you full control of which scripts to add an ‘async’ or ‘defer’ attribute to or to exclude to help increase the performance of your WordPress website.”
- In English:
- It basically sets it so the reCaptcha code is loaded on the website last. So once everything is loaded up and the page is loaded, then reCaptcha loads. This way, it doesn’t affect your site’s speed that is visible to the user’s naked eye.
- The disadvantage is, if the bot can scroll down your page and input in the form faster than your entire site can finish loading, then it won’t be blocked.
- However, you should be fine because most bots usually stick around the site for a while and pretend to scroll around. This is to make them less susceptible to be detected. Because instant scrolling down to the end of the site is easy for even the most elementary spam detection to detect as bots.
- what does the plugin do?
-
Conclusion: overall for your website site, we recommend using reCaptcha v2 invisble reCaptcha. And then if that still doesn’t filter out the spam submissions, then use reCaptcha v2 (“I’m Not A Robot”).
How to Add reCaptcha v2 to your WordPress Site
If you are using Wp Form 7 here’s how to add it in:
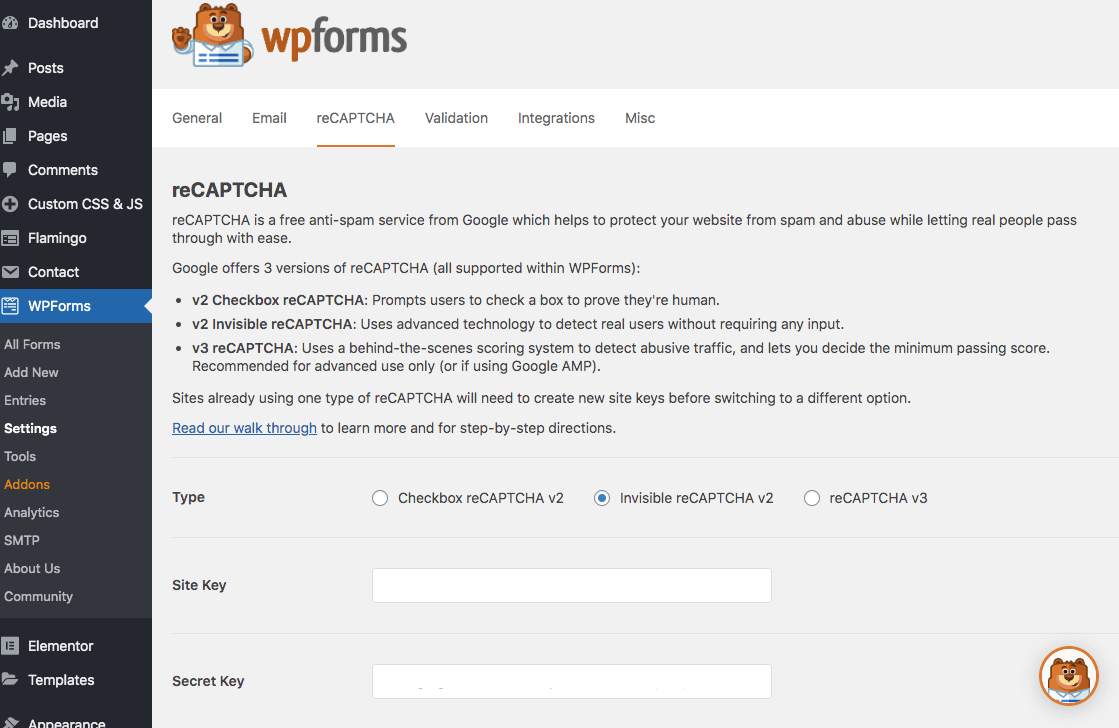
- Go to WPForms > Settings > reCAPTCHA
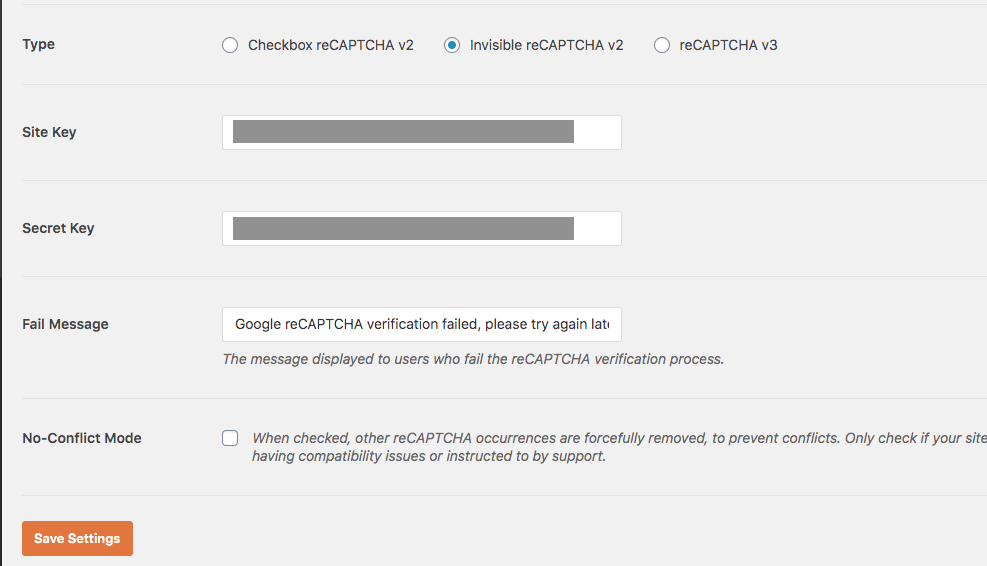
- Select “Invisible reCaptcha v2”.

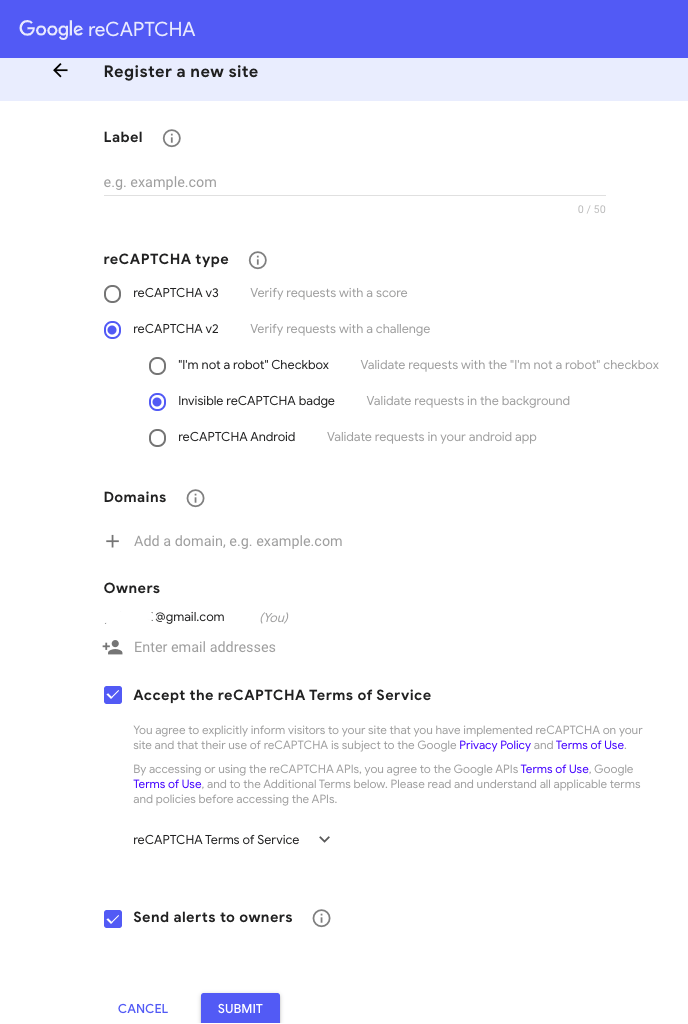
- Go to https://www.google.com/recaptcha/ to get your keys for the site (note: you can only do one version of the ReCaptcha per site)
- Follow the Google ReCaptcha instructions and put in your site url.

- ^Also make sure you add in your root domain, so if your domain is https://www.irvinecadentist.com/ add in: irvinecadentist.com
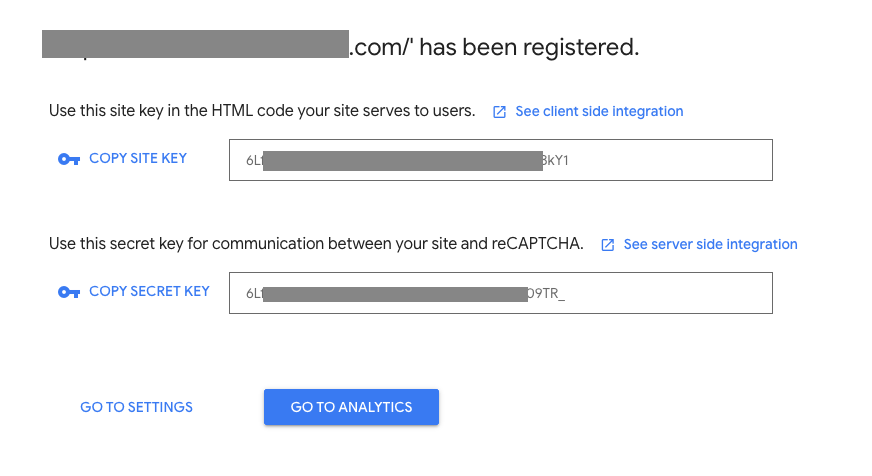
- Once you hit submit, Google will give you the keys. Copy and Paste those keys into WP Forms settings.
- You’ll see this:
 copy those keys.
 - Paste those in here:
 and click “Save Settings”.
- You’ll see this:
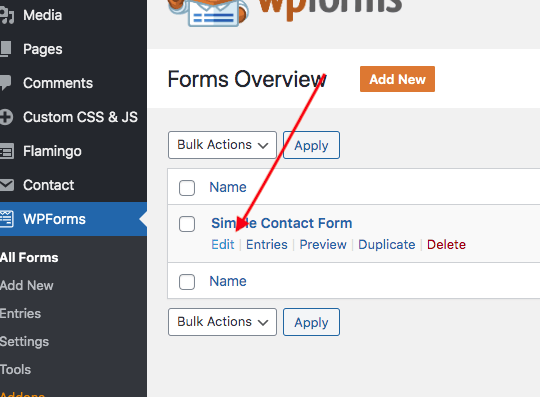
- Now go to your forms and click “edit” on the one you want to add reCaptcha to:

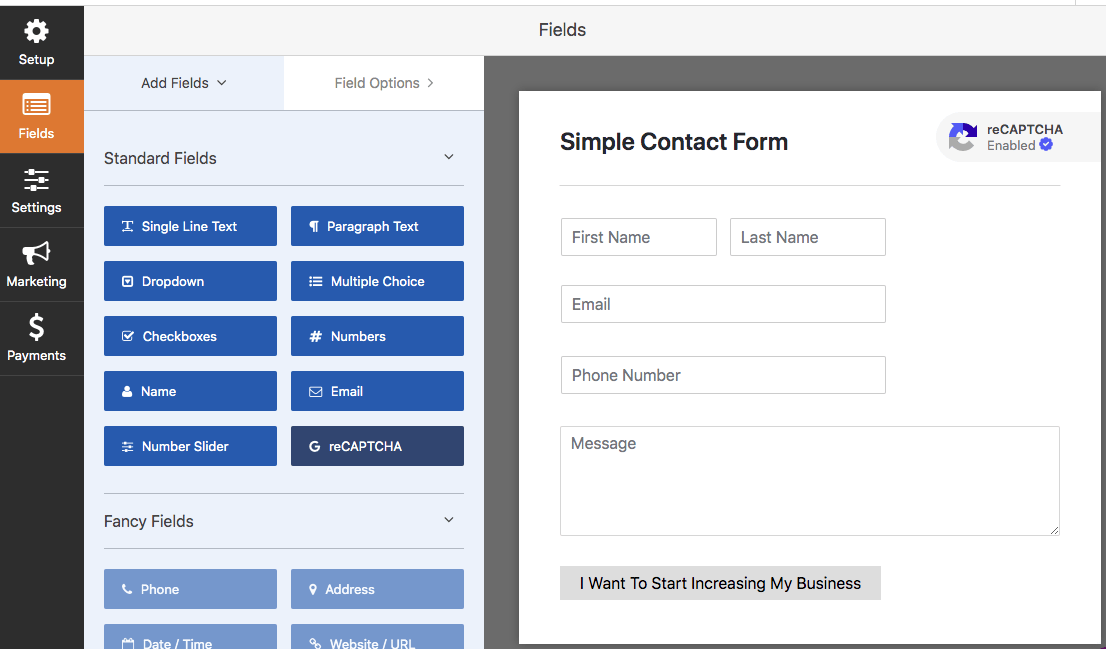
- Now click the “reCAPTCHA” button to add it.

- Double check to see if the “reCaptcha icon” shows up. There’s a bug in WPForms. The first time you add it, it doesn’t get added. So you have to exit the form and click “edit” and click on the “reCAPTCHA” button again).
- Make sure to save before leaving. And you’re done!
If you are using Contact Form 7 plugin, we recommend using another form plugin. Contact Form 7 forces you to use reCaptcha v3:
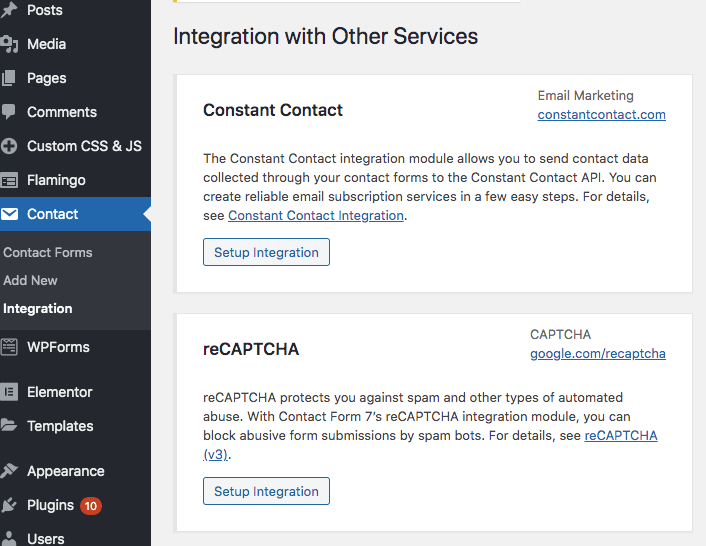
which as we’ve stated before, is not suitable for your WordPress needs.
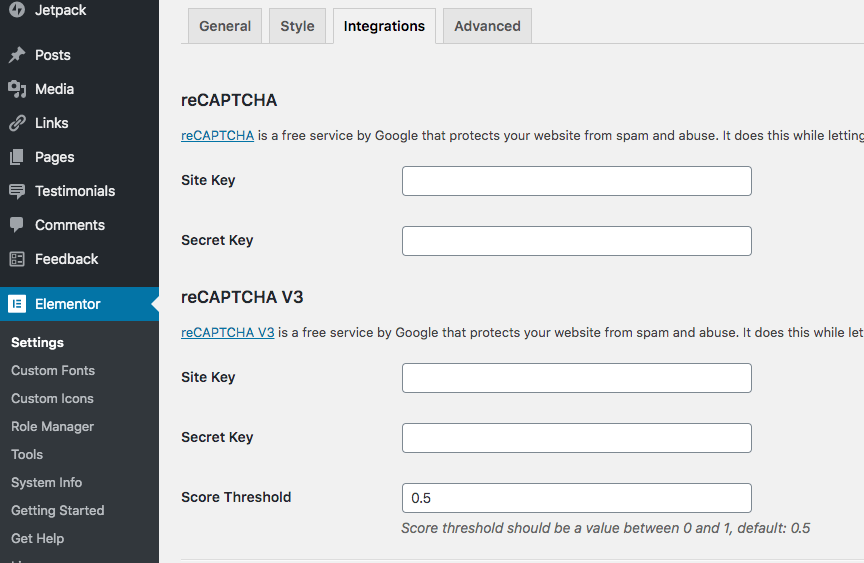
Update: Elementor now has it’s own forms. And it integrates with reCaptcha and has honeypot, thank you page redirect, hidden fields, notifications, and auto-response confirmation email. Thus if you are already using Elementor you can get rid of the WP form 7 and get rid of one extra plugin.
How to hide Invisible reCaptcha v2’s floating badge.
Now that you have added in the invisible reCaptcha v2 you will see the floating badge following you everywhere on that page. It’s annoying and gets in the way of buttons, especially on mobile.
Here’s is the correct way to hide it in WordPress.
Note: Other people will tell you to hide it in Style.css in your WordPress sheets. Don’t do that. If you don’t know how to code, you could potentially mess something up.
The biggest disadvantage of adding the code straight to Style.css though is this. If you don’t know how to use child themes, when you update your theme, the style.css will revert to its default code and you’ll lose the badge and have to remember to add it in again.
Step 1. Under Appearance click “Customize”

Step 2. Click Additional CSS
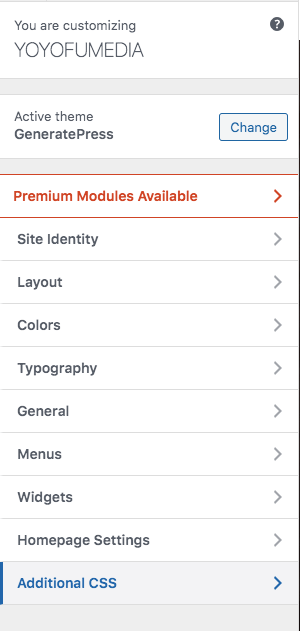
Step 3. Add the reCaptcha Code In Then Click “Publish”
Copy and paste this code into the Additional CSS Field:
.grecaptcha-badge {
    opacity: 0;
    visibility: hidden;
}
Here’s more information on what the code is for the developers:
-
visibility: hidden; - hides the badge. Source.
-
opacity: 0; - turns the badge transparent so the human eye can't see it.
Either one of these by itself will work to hide the badge from the human eye, we include both codes just to be safe.
Want to Collapse the badge but not completely hide it? use:
-
visibility: collapse;
Warning: some tutorials will tell you to use “display: none;” instead of “visibility: hidden;”, that would be wrong. Do not use “display:none” as it will disable the spam checking.
If adding the code and your badge still isn’t being hidden, add “!important;” to the end of the visibility code like this:
-
visibility: hidden !important;
And !important is just regular css code for just in case some other code is trying to overwrite it. !important makes it so it won’t be overwritten.
-
- Follow good coding practice, don’t use !important if possible. When you use !important for everything it can become a big headache. Because you can’t figure out which is overwritting which because all your css code will have !important. Thus you’ll have to check every instance of !important in your code. Read more on when to use !important in css here.


 copy those keys.
 and click “Save Settings”.