Wondering how to create and send hundreds of personalized emails fast every day and not get sent to spam?
We have a solution using the Mail Merge add-on with Mozilla Thunderbird. It can help effectively make your cold email campaign quicker and more effective.
Here are the 10 steps on how to use Mail merge Thunderbird add on:
Step 1: Create a Spreadsheet or Excel Sheet (CSV file)
In our case, we created a Google Spreadsheet then downloaded it as a CSV file. You can use either Excel or Google Spreadsheet as long as Thunderbird can access your file.

Step 2: Create the columns based on the parameters needed to be used (e.g. name, email, attachment, etc.)
For our example, we kept it simple and only had Name and Email as our parameters.
You can add more columns depending on what you want to add specifically for each of your recipients. For example, if you were to send them a specific image for each, you can add an Image column.
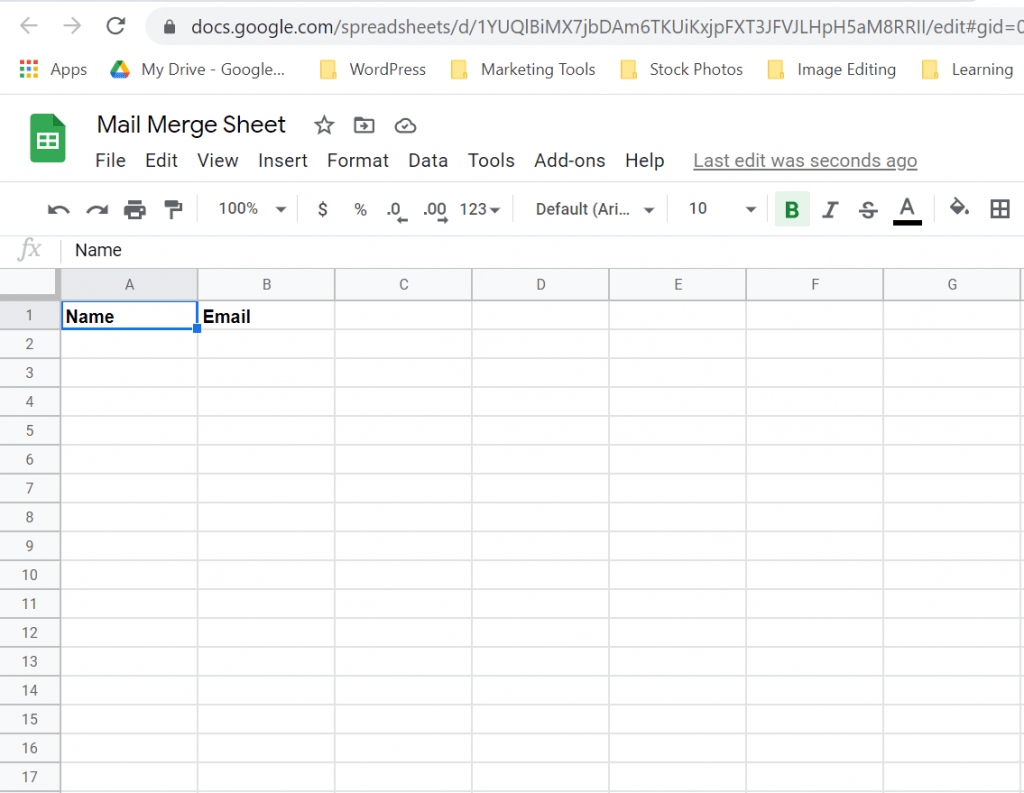
Step 3: Fill in the Rows
Next, you will start filling out your rows with the corresponding information. In this example, we put down two emails and the names of the email recipients.

Afterward, save the sheet.
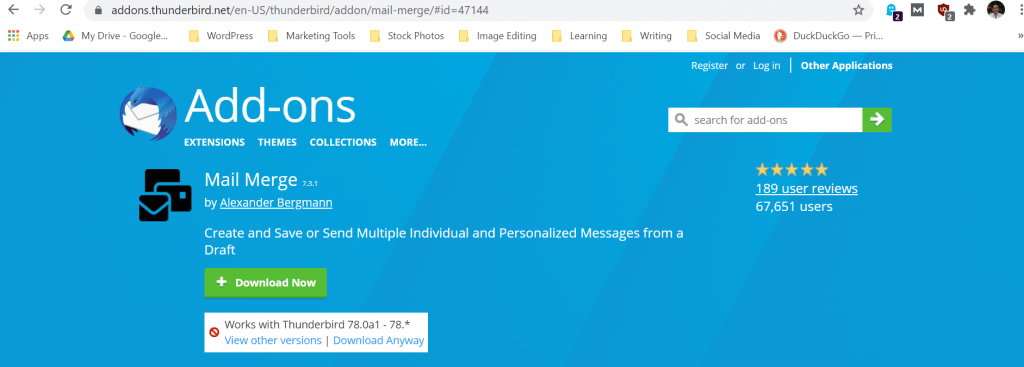
Step 4: Go to Thunderbird and download the Mail Merge Add-On
Then go to Mozilla Thunderbird and download the Mail Merge add-on if you haven’t already.
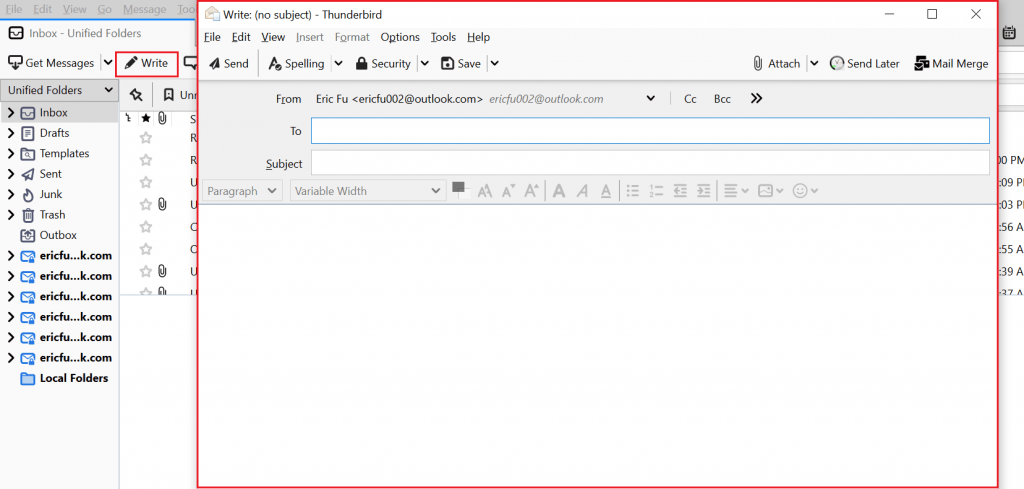
Step 5: Create a New Message (“File -> New -> Message”)
Once you download the add-on, click on Write and start creating your message.
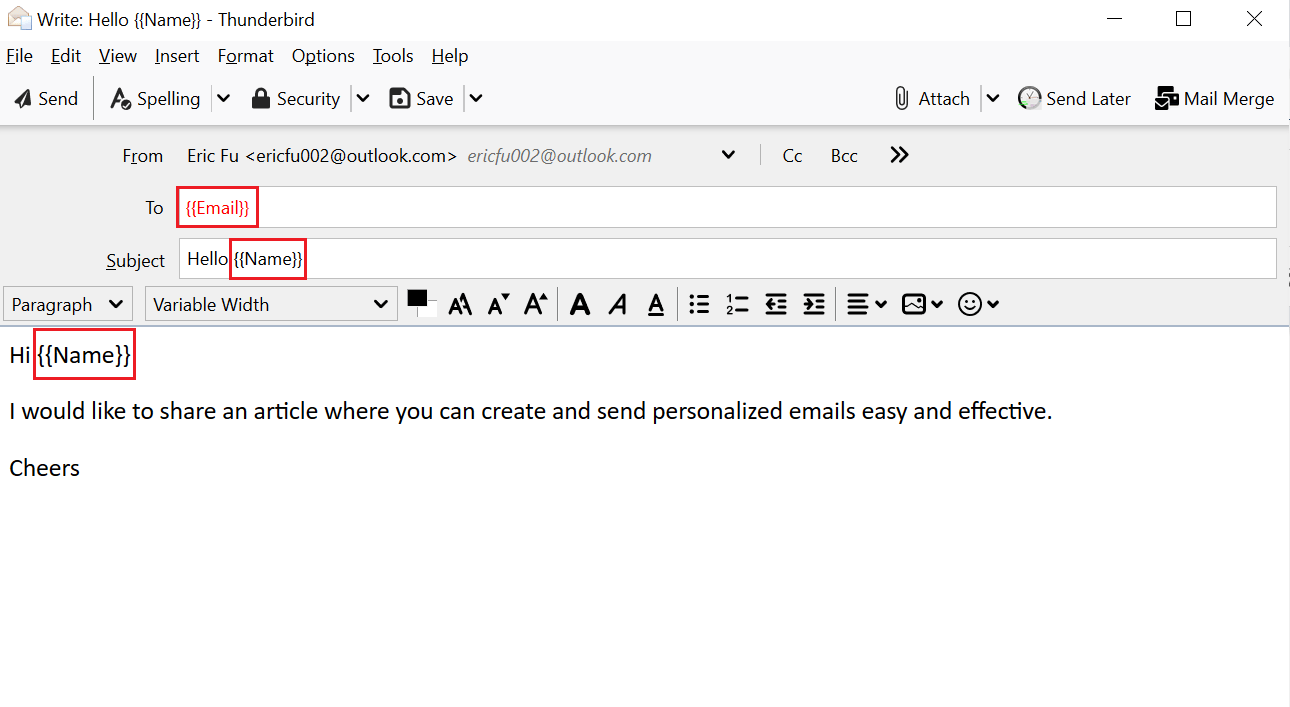
Step 6: Create your template by adding the Variable(s)
You can create your template by adding these things:
– The To
– The Subject (variables are supported)
– The Body (variables are supported)
– (Global) Attachments (optional)
There are different ways you can format the variable options. Here are the different ways you can do it:
- {{Email}}
- {{FirstName}}
- {{LastName}}
- <{{Email}}>
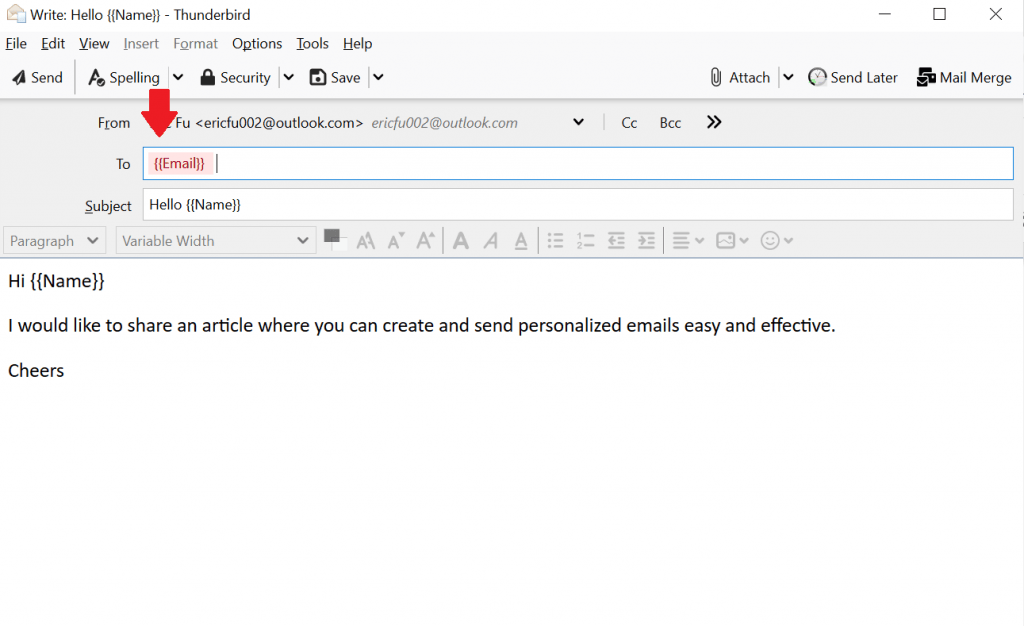
In our example, we add a variable in the To, Subject, and body of the email.

Tip: Make sure your variable in the To: section is entered and highlighted red. If it is not highlighted like the example below, you get an error message.
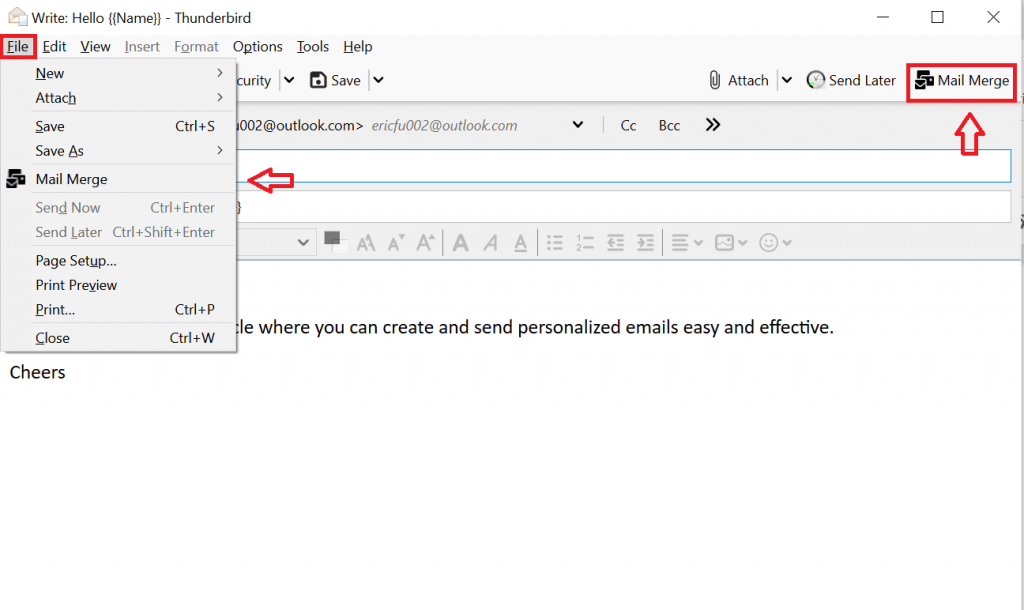
Step 7: Click File = > Mail Merge
Once you created your email template, click on Files and then click on Mail Merge. You can also find it in the top right corner when you create your email template.
Step 8: Select Your Source And Check Deliver Mode
In our case, we choose CSV file as our Source and Save As Draft (in case we want to delete a specific email later on)
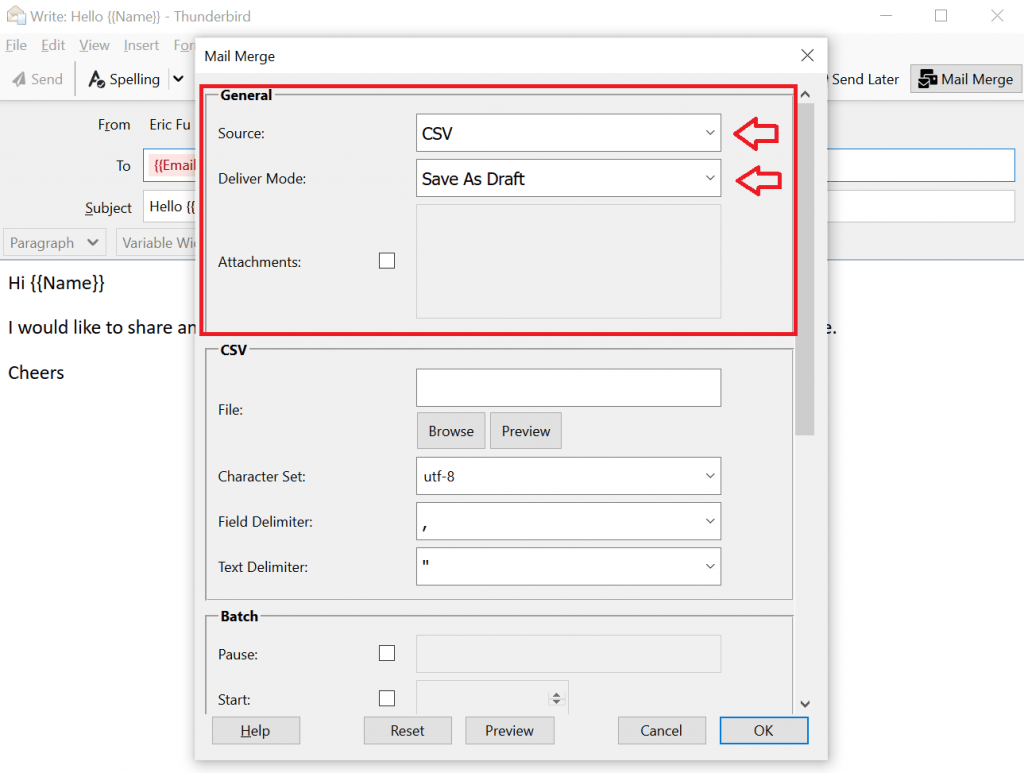
Step 9: Select the File and check Character Set, Field Delimiter, and Text Delimiter
We then choose the CSV file that we want to use. For the Character Set, Field Delimiter, and Text Delimiter. We left it the same.

Step 10: Then Click OK
When you finish filling out the setting, you can click OK
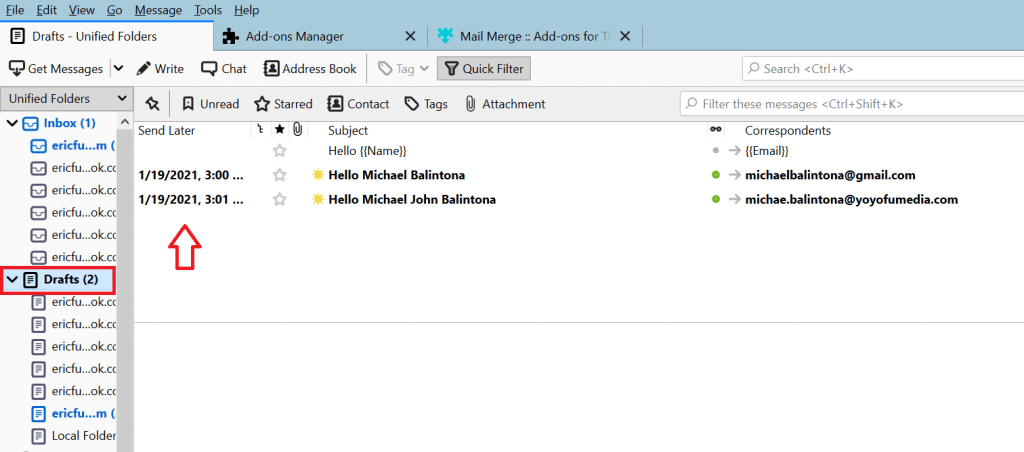
Because we choose Save As Draft as our Deliver Mode, it’s sent to our draft, where you can send them on your own time.

If you want to send it right away, you change your Deliver Mode to Send Right Away.
Although this saves time, there are times when you want to change or delete a specific email. That is why we found a way, so you don’t need to individually send an email from your Draft but still have the option to keep your email in Draft if you want to delete an email or double-check later.
Bonus Tip #1: Scheduling your email
You have the option to Send Right Away, Send Later, or Sent To Draft.
We pick Sent To Draft because you can implement Send Later as well.
All you have to do is create a column with the Time and Date you want to send the email.
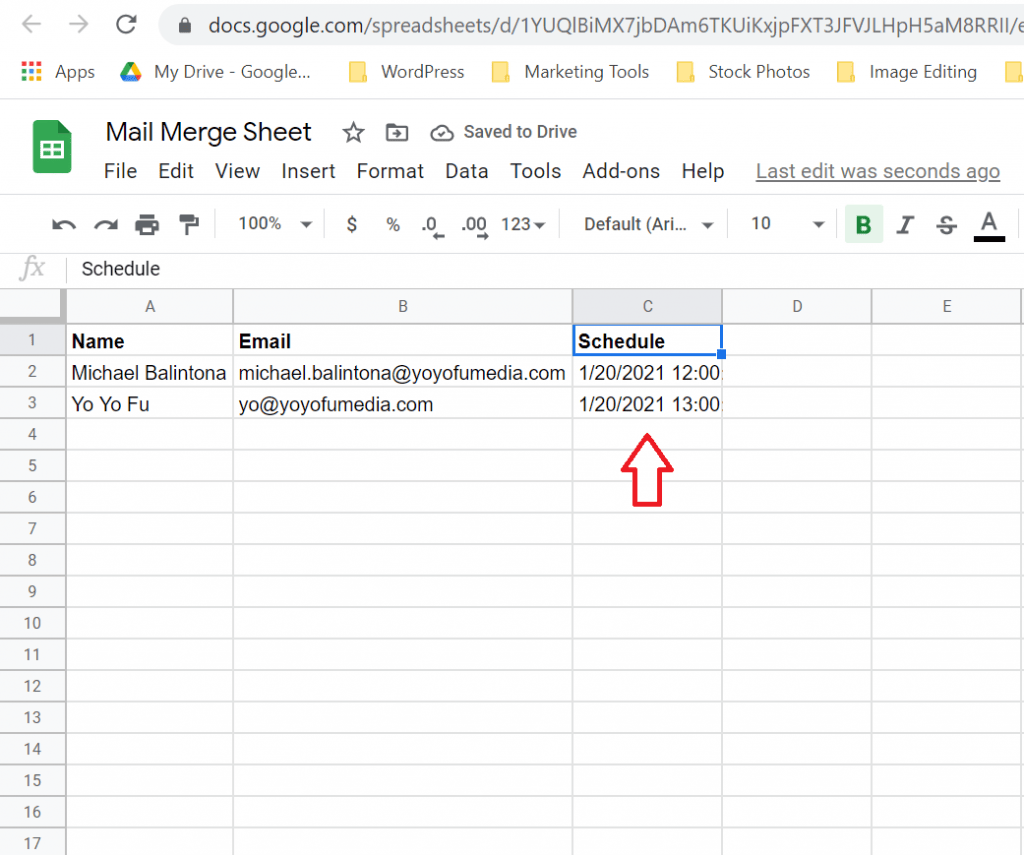
Under Send Later, include the parameter {{Schedule}} or the corresponding column name.
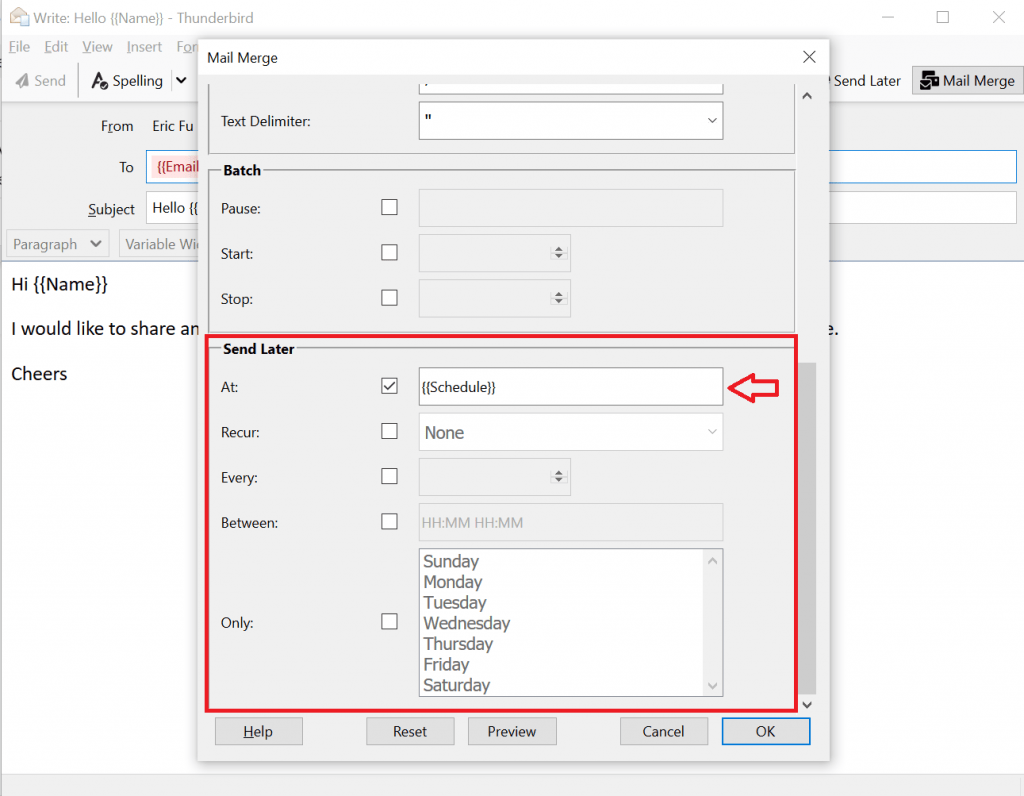
This will create drafts that will send at the times you specified. This is great because you can easily send out 50 emails but spread out through 10 days to prevent your email from being sent to spam.
Steps To Schedule Your Emails:
- Create a Schedule column with the time and day you want your emails to be sent
- In the mailmerge settings, set your Source, Deliver Mode as Save As Draft, and keep Character Set, Field Delimiter, and Text Delimiter the same.
- Scroll down to Send Later
- In the At section, put the time and date column. (In our case, we put {{Schedule}} because we named out column Schedule)
- Click OK
Bonus Tip #2: Using Multiple Email Accounts
Because Thunderbird allows you to manage multiple email accounts, you might want to know a solution to use mailmerge with multiple email addresses.
For mailmerge with multiple accounts, let’s say you want to send 15 emails each from your 5 Gmail accounts (Outlook, Yahoo, and other email addresses), then you need 5 different spreadsheets.
You need to create different spreadsheets because each account is tied to a certain spreadsheet.
Steps To Using Mailmerge with Multiple Accounts:
- There are different ways to start, but here is what we would do.
- Create a Master Sheet with all the emails and their names.
- Break the sheet into separate sheets matching the number of email account you want to use
- Create your email template
- Schedule the time and date that you want your emails to be sent
- Use Mail Merge individually on each of your emails
- Start your email campaign by pressing OK
Conclusion
With these steps, you can make your email campaign easier and more effective. By learning how to use Thunderbird’s Mail Merge add-on, you can create personalized emails that can increase click-through rates without needing to individually write thousands of emails. Also, you can do everything in one with the scheduling feature. Good luck with your cold emailing campaign!


2 thoughts on “How To Use Mail Merge Thunderbird Add On For Cold Emailing”
If in the TO: field the variable {{Email}} is not highlighted in red, what is the fix?
How come I can’t attached pics, etc to the mail merge? Even if I attached a pic when setting up the mail merg, after I send the emails the attachment does not show up. I also get the error “Select attachment” when trying to send, so I have to uncheck the box first.