Granting access to your Facebook Business Account involves assigning roles to individuals or partners. These roles determine the level of access and permissions someone has within your business account. Follow these steps to grant access:
Table of Contents
ToggleGranting Access: Step By Step
1. Log In to Your Facebook Business Account:
- Open your web browser and go to Facebook Business.
- Log in using your credentials.
- In the top right corner, click on the gear icon and select “Business Settings” from the dropdown menu.
2. Choose the Business Account:
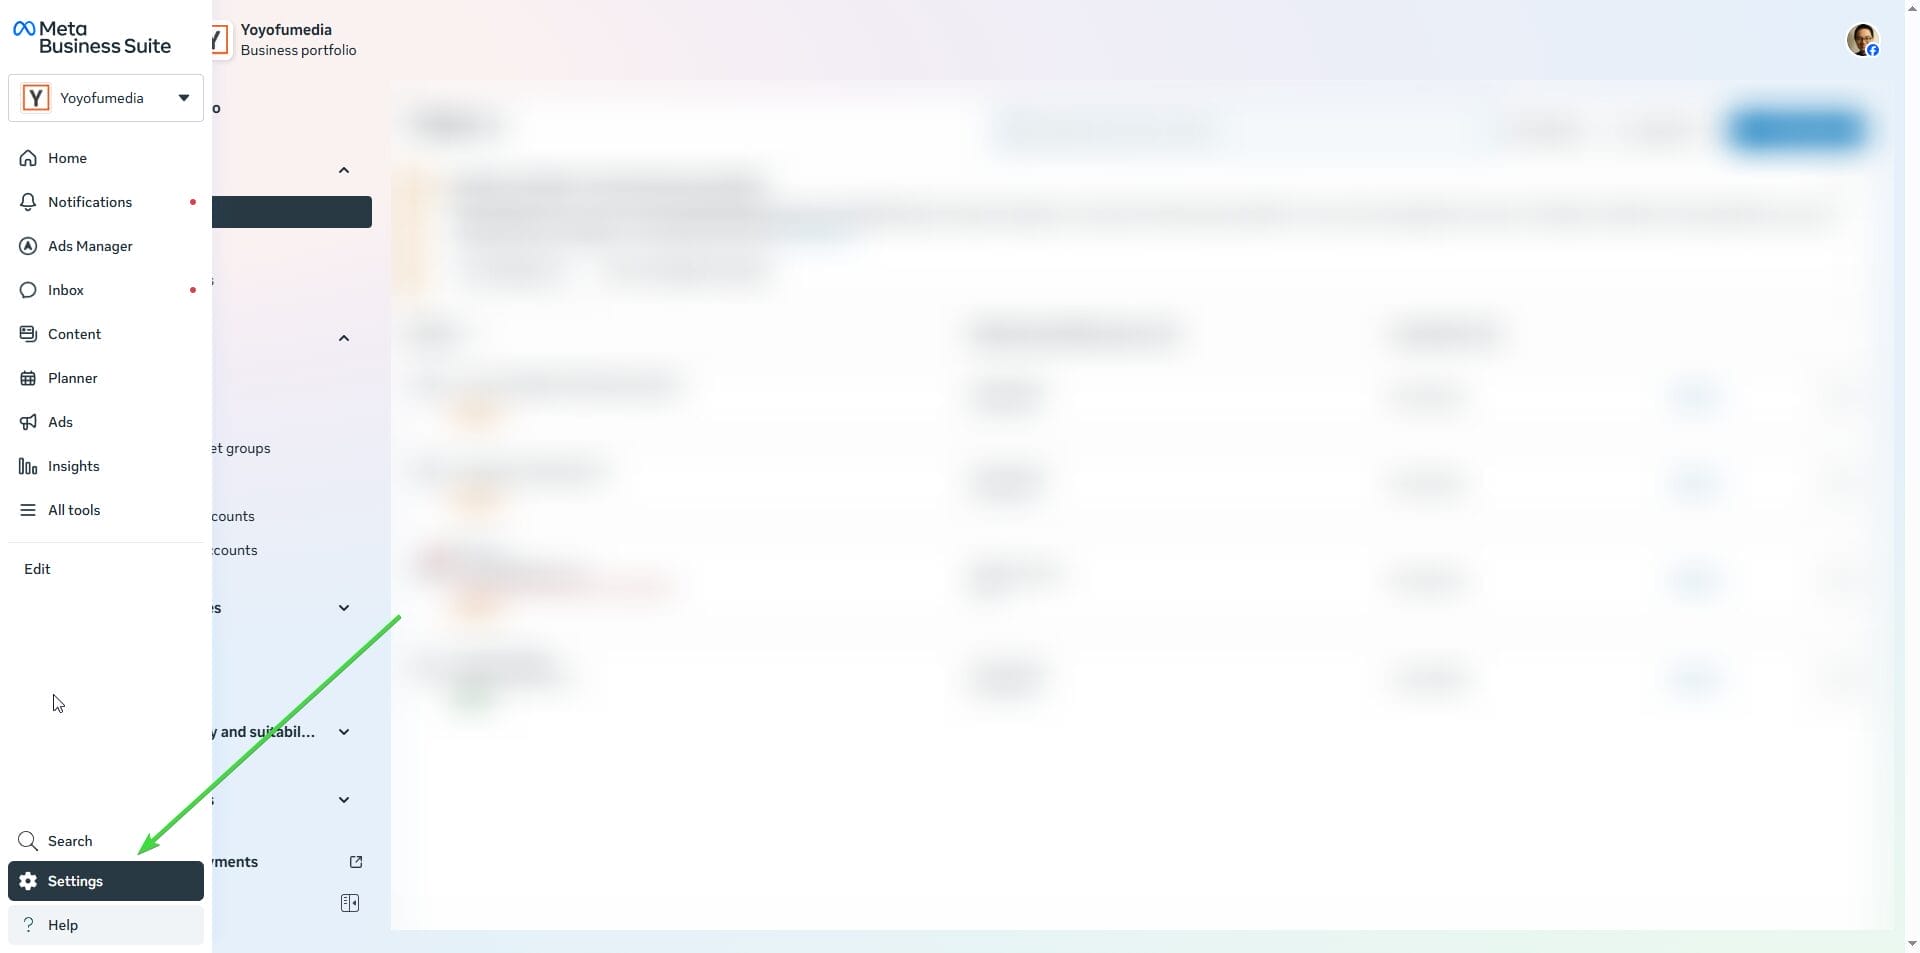
- Under “Business Settings,” select the business account you want to grant access to.
3. Click on “People”:
- In the left sidebar, click on “People.” This section manages the individuals and partners who have access to your business account.
4. Add a New Person or Partner:
- Click the “+ Add” button to add a new person or partner to your business account.
5. Enter Email or Name:
- Enter the email address or name of the person you want to grant access to.
- If the person is a friend on Facebook, their name should appear in the suggestions.

6. Choose Role:
- Select the role you want to assign to the person. Roles include roles like Admin, Editor, Moderator, Advertiser, etc.
- Each role has different levels of access and permissions.
7. Define Access Level:
- Depending on the role, you may need to further define access. For example, an Advertiser might need access to Ads Manager, while an Analyst might only need access to Insights.

8. Review and Confirm:
- Review the information to ensure it’s accurate.
- If everything is correct, click “Invite” or “Add” to send the invitation.
9. Confirmation Email:
- The person you invited will receive a confirmation email. They need to follow the link in the email to accept the invitation.
- Once the person accepts the invitation, their status in the “People” section will change from “Invited” to “Active.”
10. Adjust Access at Any Time:
- In the “People” section, you can modify roles or remove access at any time by clicking on the person’s name.
Congratulations! You have successfully granted access to your Facebook Business Account. Ensure that you regularly review and update access permissions based on the changing needs of your business.
Connecting Your Business Partners or Ad Agency:
If you’re working with external partners, such as a marketing agency or business collaborators, you can connect them to your Facebook Business Account for seamless collaboration:
1. Navigate to Business Settings:
- Access Business Settings as described in steps 1 to 3 from the previous guide.
2. Click on “Partners”:
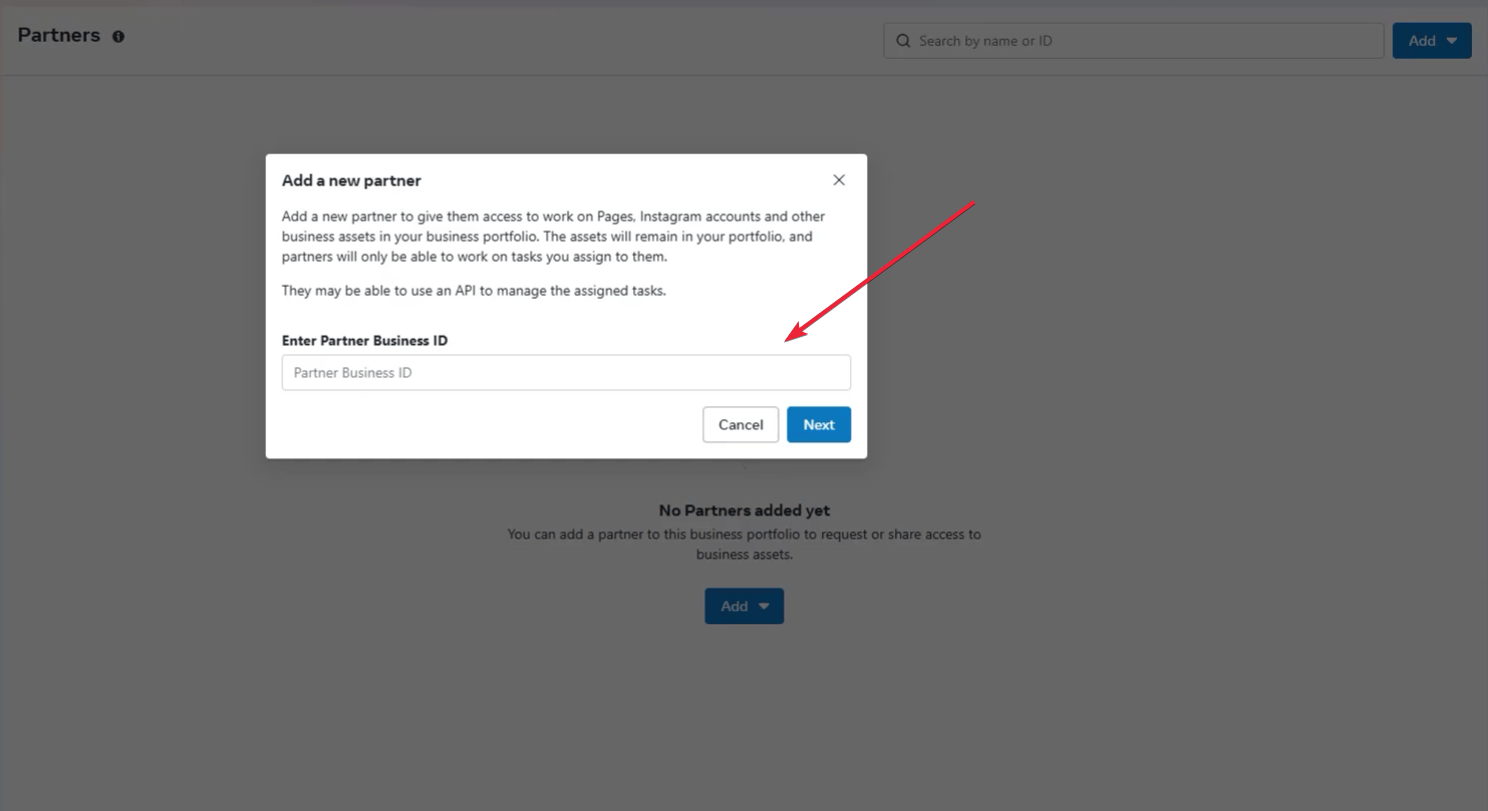
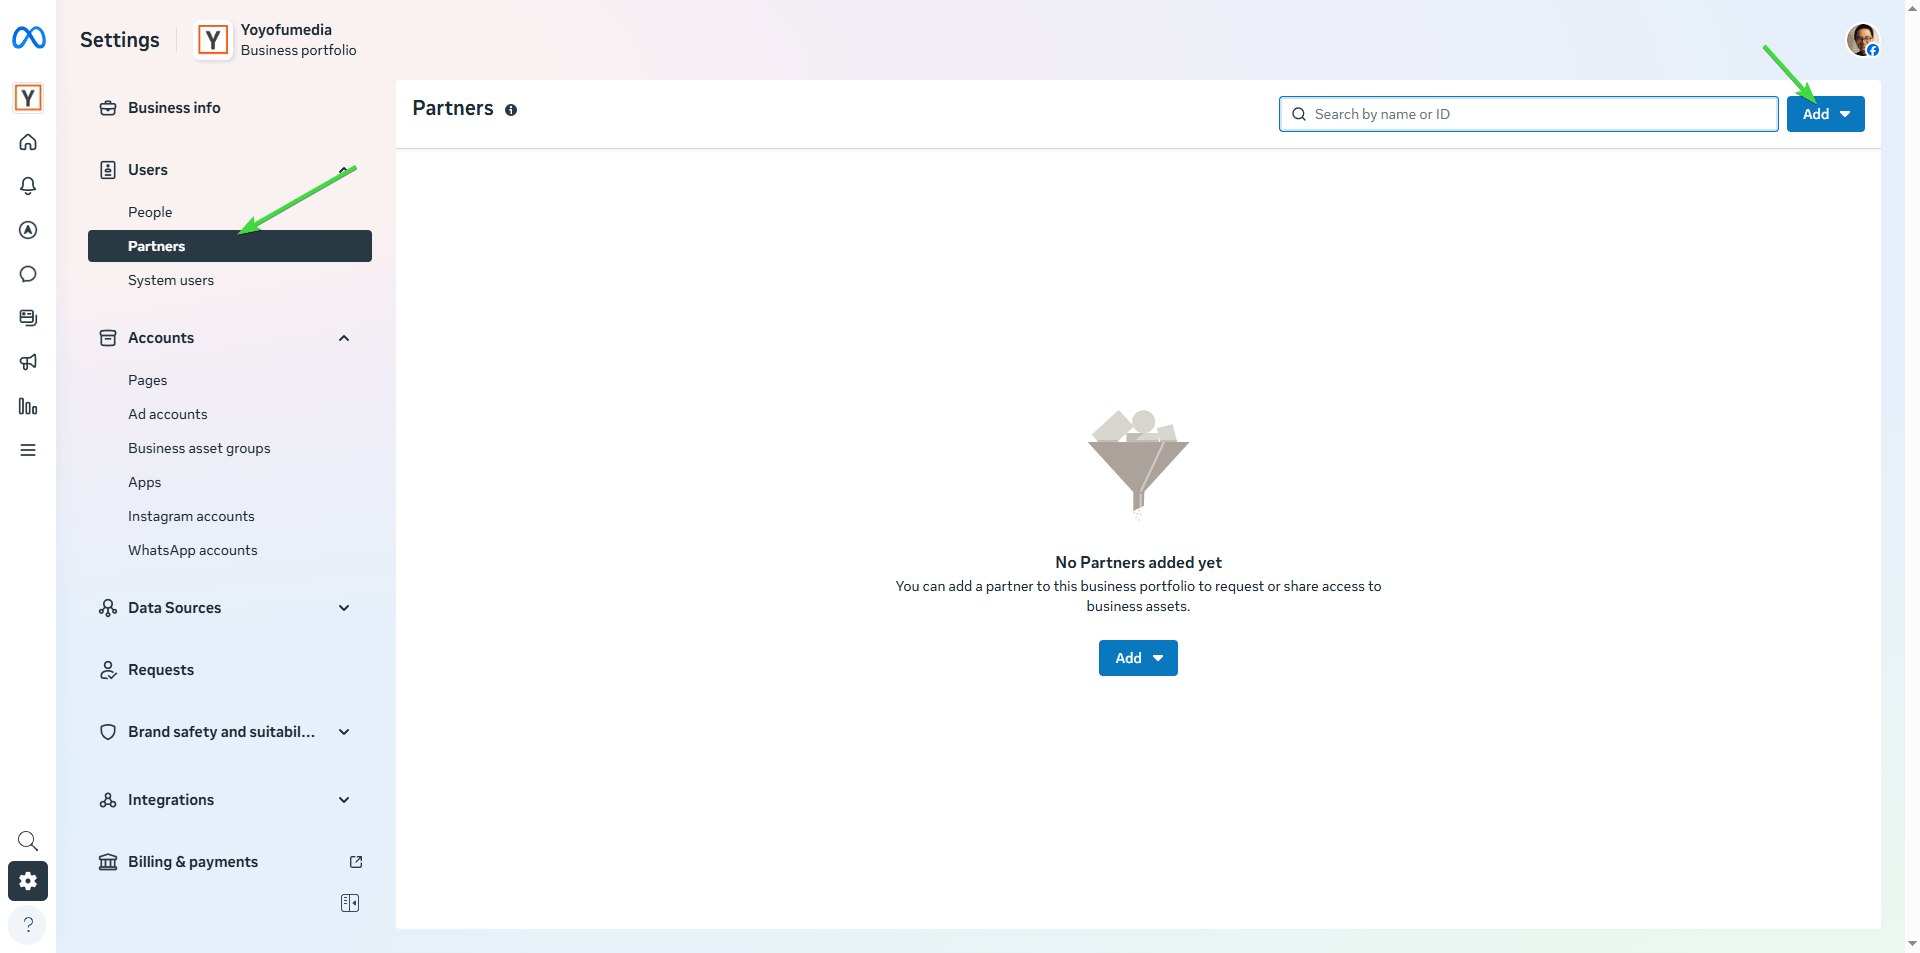
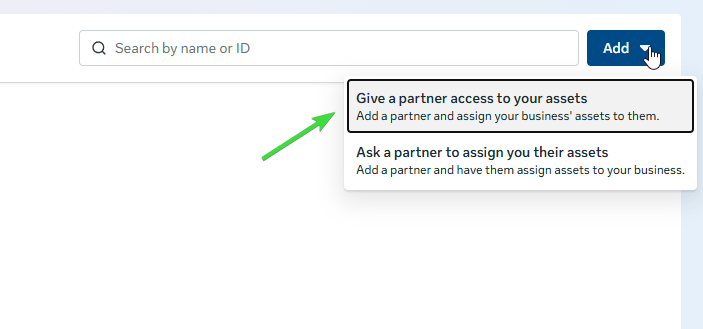
- Instead of “People,” select “Partners” from the left sidebar.
3. Add Partner:
- Click the “+ Add” button to add a business partner or agency.
- And then click “Give a partner access to your assets”

4. Enter Partner’s Business ID:
- Enter your partner’s or agency’s business ID, the. This ID is unique to each business and can be obtained from your partner.

5. Define Access and Permissions:
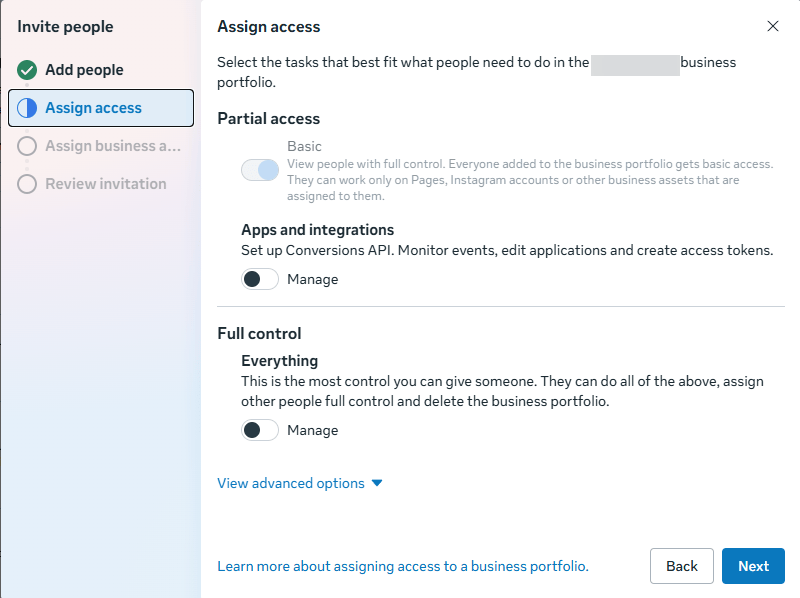
Specify the level of access and permissions your partner or agency should have. Facebook provides different access levels to choose from.
6. Send Request:
- Click “Send Request” to notify your partner or agency about the collaboration.
7. Await Partner Confirmation:
- Your partner will receive a notification and needs to confirm the connection. Once confirmed, they will have access to the specified assets.